How to Create a BIM Viewer Using Godot Engine
3D Viewers Matter in the BIM World
In the modern AEC landscape, 3D viewers have evolved from a nice-to-have to an absolute necessity.
Whether it’s for internal coordination, client presentations, construction validation, or facility management, being able to view, navigate, and inspect BIM models on any device—without heavy software—has become a core requirement.
While many professionals are familiar with platforms like Unity, Unreal Engine, Autodesk Platform Services (APS), or Three.js, few have explored Godot, a powerful open-source engine that is particularly well-suited for lightweight, embeddable BIM viewers.
Why Use Godot for a BIM Viewer?
Godot offers a compelling alternative to traditional engines and web libraries for a BIM viewer:
| Feature | Godot | Unity | Unreal | APS Viewer | Three.js |
|---|---|---|---|---|---|
| 💸 Cost | ✅ Free & Open Source | ❌ Licensing fees | ❌ High licensing cost | ✅ Free (API-dependent) | ✅ Free |
| 🌐 Web Deployment | ✅ HTML5 export built-in | ⚠️ WebGL with limitations | ❌ No built-in web export | ✅ Web-based | ✅ Native |
| 📦 Format Support | ✅ glTF/glb natively | ✅ with plug-ins | ✅ with plug-ins | ✅ via translation | ✅ Native |
| 🧩 Ease of Customization | ✅ Full control, scriptable | ⚠️ Complex pipeline | ❌ Heavier setup | ⚠️ API-only | ✅ Code-based |
| 📁 Lightweight Hosting | ✅ Simple static files | ❌ WebGL support complex | ❌ Not web-suitable | ✅ CDN-dependent | ✅ Static files |
Godot gives you the perfect blend of visual fidelity, lightweight deployment, and full ownership—without vendor lock-in.
If you want a free, scriptable, self-hosted viewer that works across platforms (desktop, mobile, and web), Godot is worth your time.
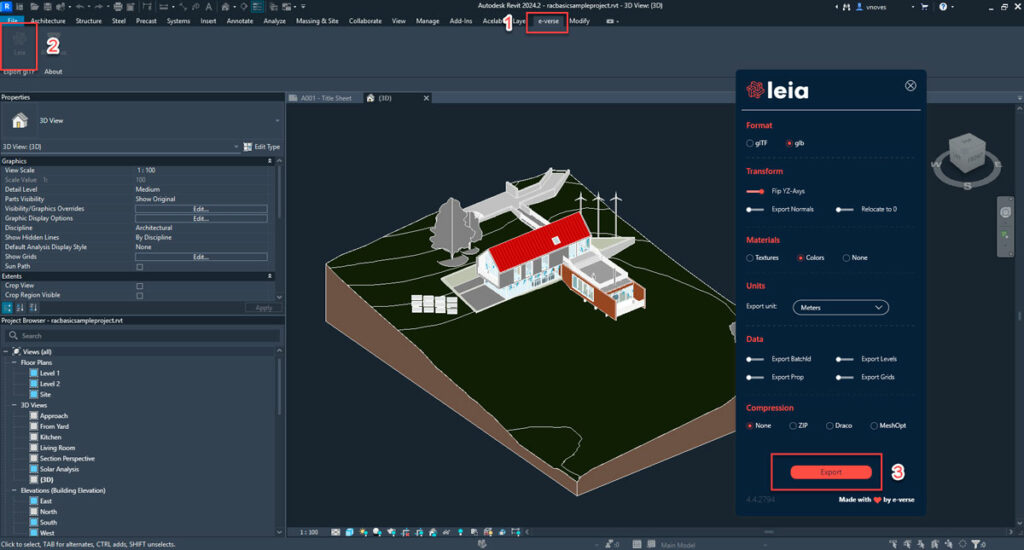
Step 1: Export Your Revit Model as glTF Using Leia
The best way to get your Revit models into Godot is to use glTF, a well known 3d format(if you want to know more, check our post what is a GLTF) using the Leia glTF Exporter—our open-source Revit add-in purpose-built for this workflow.
Step 2: Download and Set Up Godot
- Go to https://godotengine.org/download
- Download the Standard version (Godot 4.x)
- Extract and run the executable — no installation required
Create a new project:
- Click “New Project”
- Name it
BIMViewer - Choose a folder and click Create & Edit
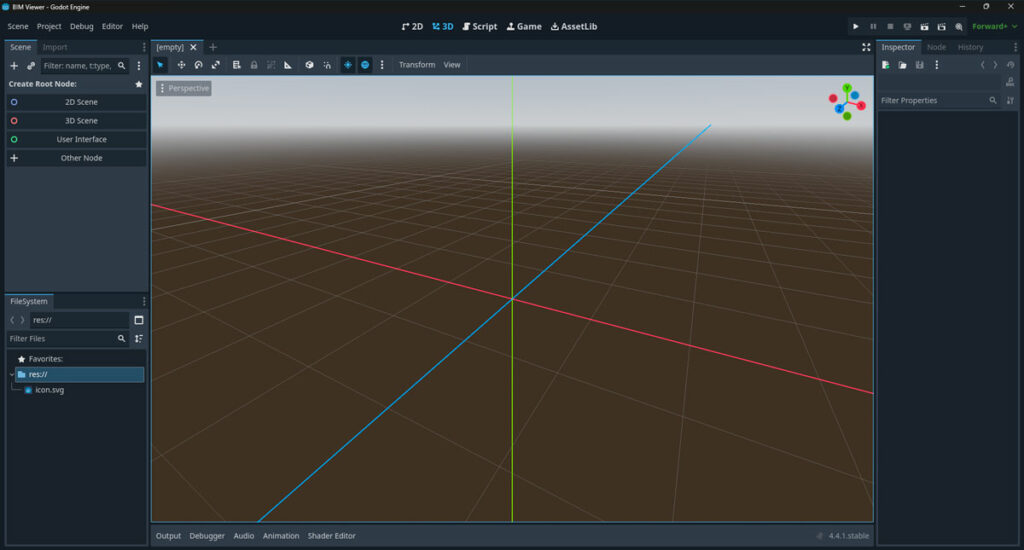
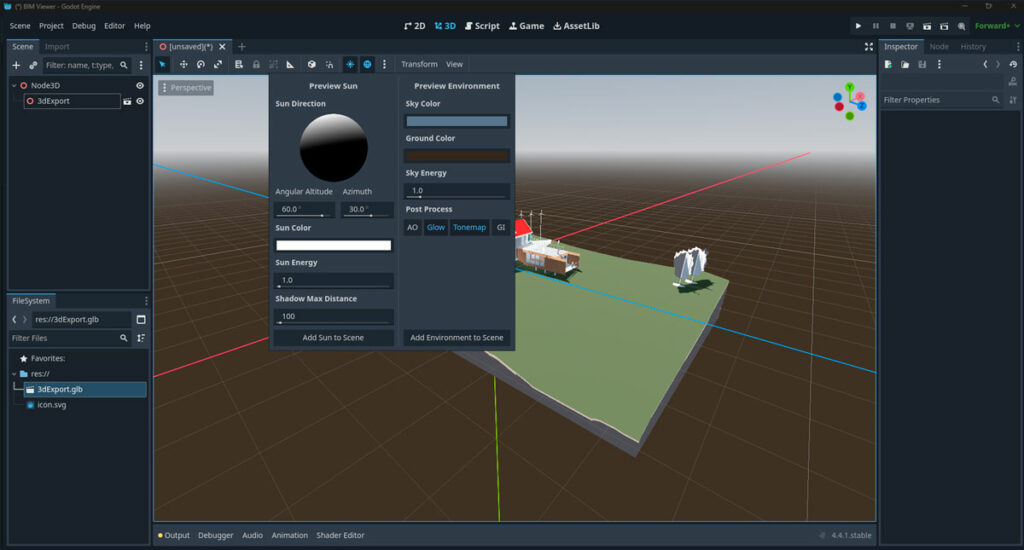
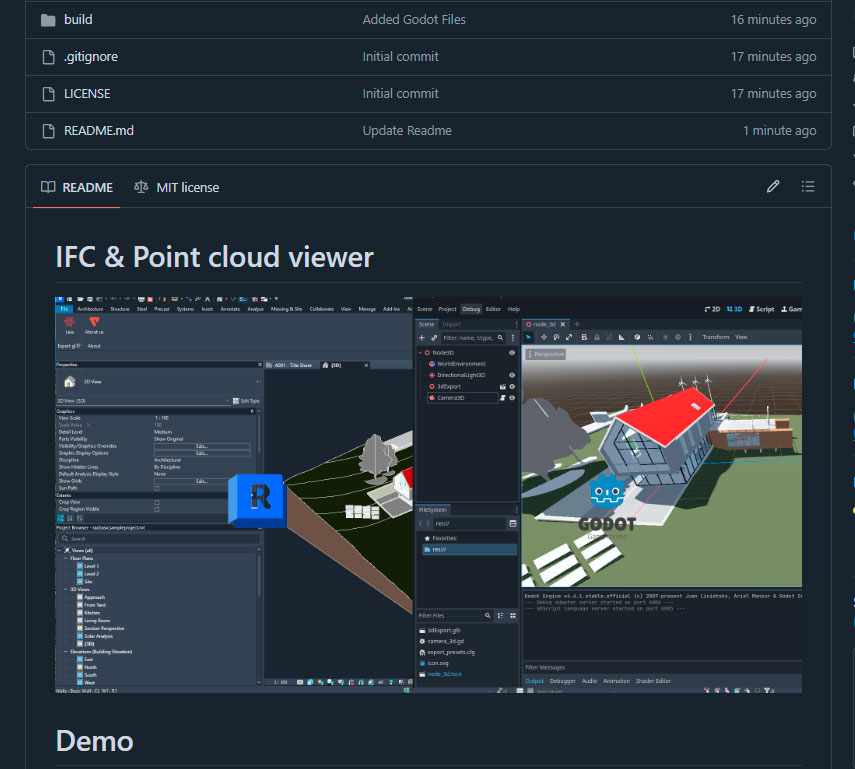
This is how the UI should look
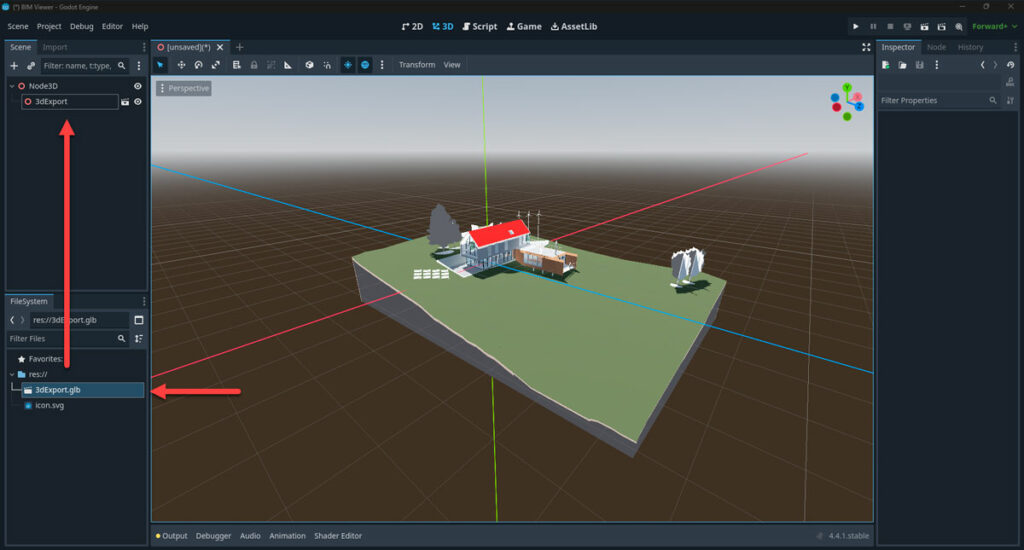
Step 3: Import Your glb Model
- Place your
.glbor.gltffile inside theres://folder. - Go to Scene > Create 3D scene
- Drag the file into the scene
- Godot will automatically import and convert it to an internal scene.
Tip: If the model is large, use .glb for faster loading and better compatibility.
Step 4: Add Lighting and Environment
Now we need to add some lighting otherwise when we build our scene is going to look dark, even if it looks great in the editor view.
- Click on the three dots next to transform
- Select “Add Sun to Scene”
- Select “Add Environment to Scene”
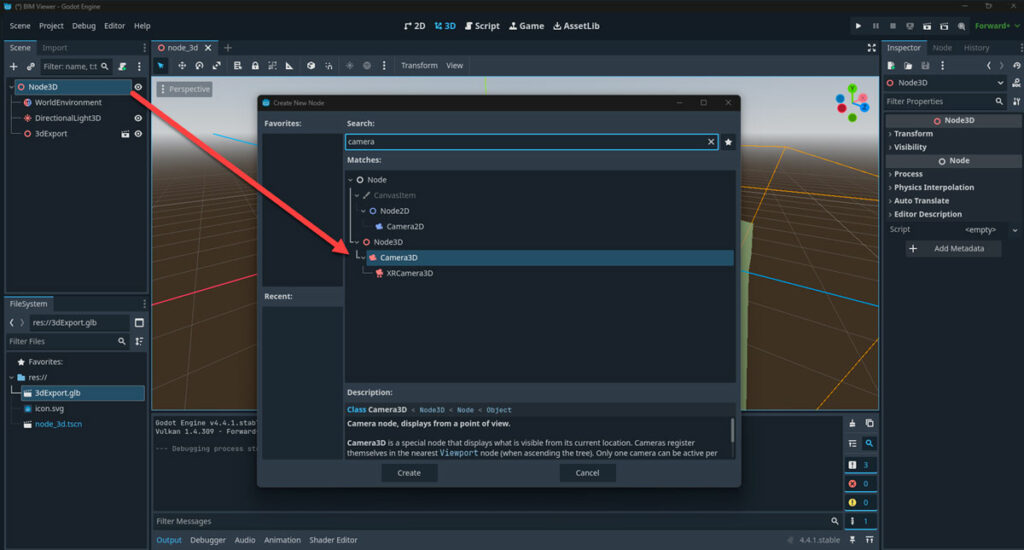
Step 5: Add an Orbiting Camera
Now we need to add a camera to be able to move, rotate and pan around our building
- Right click on Node 3D and click on “Add child node…”
- Search for Camera3D
- Click on Create
4. Select the camera and in the inspector, select current

5. Now we need to add the functionality of the camera to orbit, pan, etc, for that we are going to add an script to the camera. Right click on the camera and select “Attach Script”
6. Add the following code
					extends Camera3D

var orbit_rotation = Vector2(0.0, 0.0)
var distance := 10.0
var target := Vector3.ZERO
var orbit_sensitivity := 0.01
var zoom_sensitivity := 0.5
var pan_sensitivity := 0.01

func _unhandled_input(event):
	if event is InputEventMouseMotion and Input.is_mouse_button_pressed(MOUSE_BUTTON_RIGHT):
		orbit_rotation.x -= event.relative.y * orbit_sensitivity
		orbit_rotation.y -= event.relative.x * orbit_sensitivity
		orbit_rotation.x = clamp(orbit_rotation.x, -90, 90)

	elif event is InputEventMouseMotion and Input.is_mouse_button_pressed(MOUSE_BUTTON_MIDDLE):
		var pan = -transform.basis.x * event.relative.x * pan_sensitivity
		pan += transform.basis.y * event.relative.y * pan_sensitivity
		target += pan

	elif event is InputEventMouseButton and event.button_index == MOUSE_BUTTON_WHEEL_UP:
		distance = max(1.0, distance - zoom_sensitivity)
	elif event is InputEventMouseButton and event.button_index == MOUSE_BUTTON_WHEEL_DOWN:
		distance += zoom_sensitivity

func _process(delta):
	var rot = Basis(Vector3.UP, orbit_rotation.y) * Basis(Vector3.RIGHT, orbit_rotation.x)
	global_transform.origin = target + rot * Vector3(0, 0, distance)
	look_at(target)
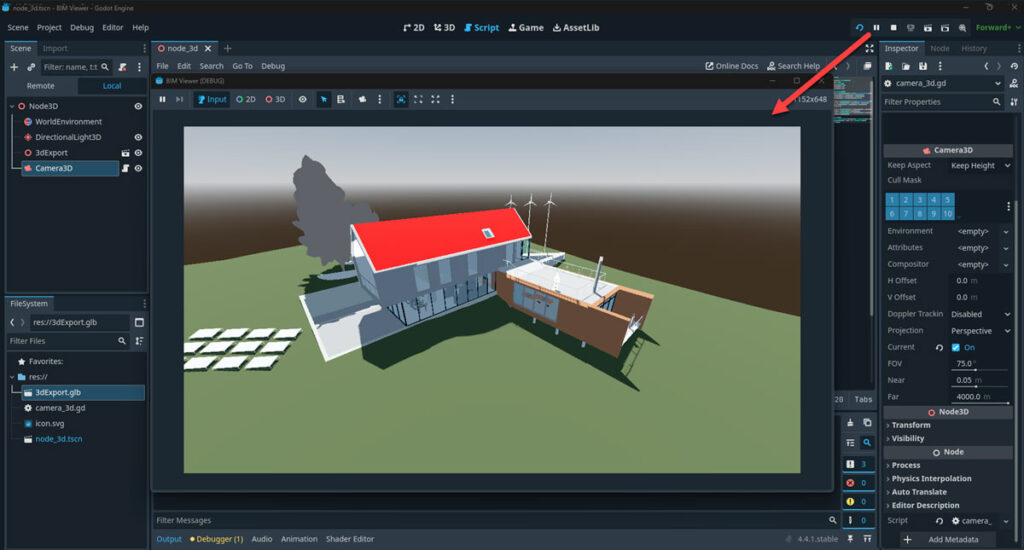
Step 6: Test it!
- Go to Project → Project Settings → Application → Run
- Set your current scene as NODE 3D
If you follow all the steps above, when you click on play, you should be able to see something like this:
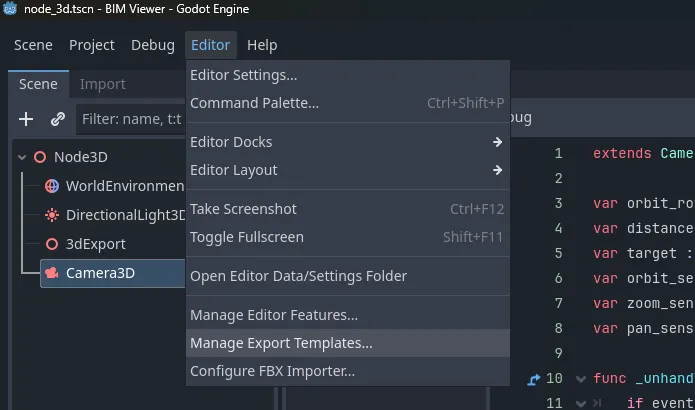
Step 7: Export to HTML and Host It
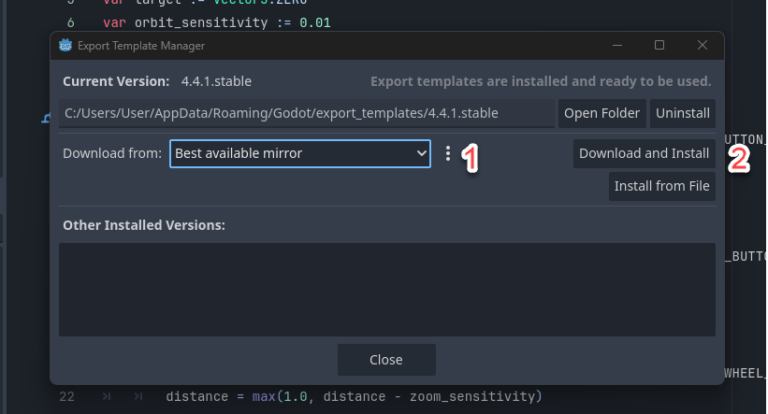
1. Install HTML5 Export Templates:
In order to be able to export our scene to other platforms, like windows, IOS or the cloud like we want, first we need to install a template that will allow us to do so.
A. Go to Project → Install Export Templates
B. Let Godot download and install them automatically
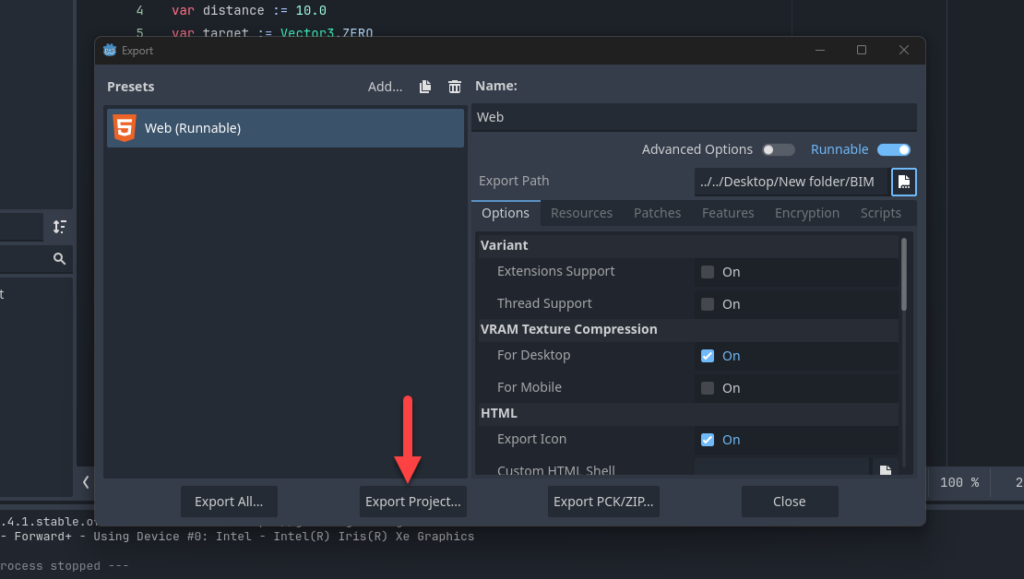
2. Export the Project:
- Go to Project → Export
- Click on Add: WEB
- Set path to
dist/index.html - Click Export Project
You’ll get a set of files (index.html, .wasm, .pck, etc.)
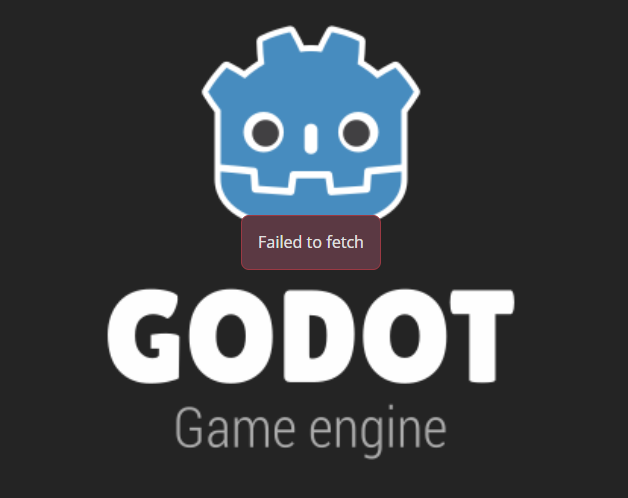
Step 8: Test you viewer
If you click directly on your html file you will get a failed to fetch, because of a CORS error from chrome
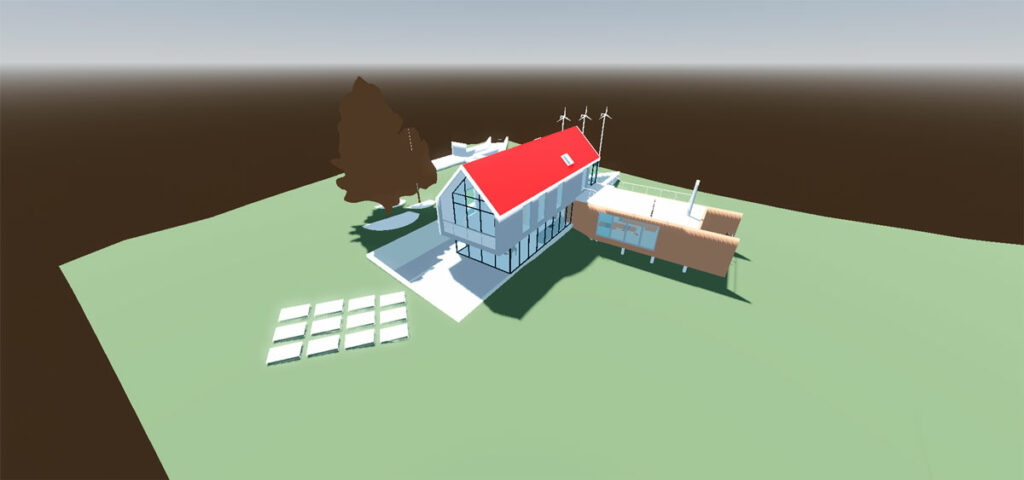
Create a simple python server on you console using “python -m http.server 8000” pointing to your current folder, that should allow you to see something like this:
Step 8: Deploy your viewer
There are many options to do this, you can a server like EC2, github pages, or even a static storage like S3
If you want a tutorial on how to do this on AWS, you can check out our Unity Post, deploying Godot can be done in the same way.
You can check a live demo Here or check our github page with the files of this project.
Wrapping Up Your Godot BIM Pipeline
Creating a BIM viewer with Godot gives you full control over your BIM experience:
- ✅ No license costs
- ✅ Host it yourself
- ✅ Customize UI/UX freely
- ✅ High performance even on the web
Whether you’re building internal tools, client dashboards, or public model explorers, Godot is a robust alternative to proprietary platforms.
If you’d like a ready-to-run GitHub repo, hosted demo, or want to integrate BIM metadata (parameters, categories, etc.) from glTF extras — feel free to ask!

Valentin Noves
I'm a versatile leader with broad exposure to projects and procedures and an in-depth understanding of technology services/product development. I have a tremendous passion for working in teams driven to provide remarkable software development services that disrupt the status quo. I am a creative problem solver who is equally comfortable rolling up my sleeves or leading teams with a make-it-happen attitude.