How to create your first Unity BIM viewer: Part II
Introduction
In the first post of the series, How to create your first Unity BIM viewer, we delved into the fundamentals of Unity, understanding its applications, and initiated the process of creating a basic viewer locally. In this second post, we’ll show you how to make the model look better and how to take that local viewer into a cloud-based platform for universal accessibility.
Improve the look and feel
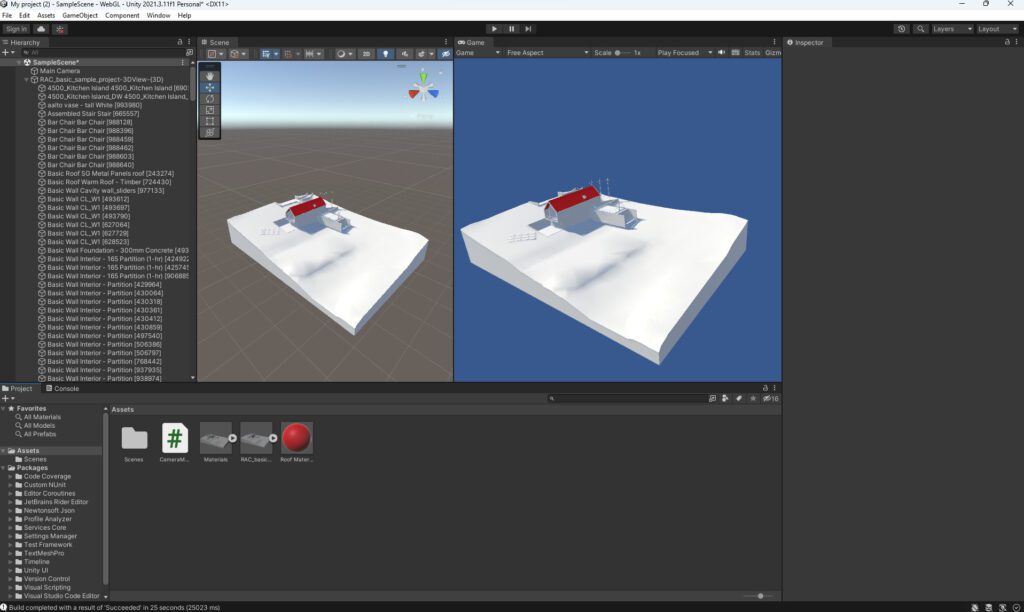
Before publishing our project online, let’s enhance its visual presentation by customizing the background. Unity uses a light blue and gray backdrop by default. To create a more personalized look, like a solid color, we can access the Main Camera settings in the Inspector window. Here, you can change the “Clear Flags” option to “Solid Color” and then select your desired background color.

Add Materials
While importing models in formats like glTF, meshes typically come with their assigned materials. However, some formats, like FBX, may not automatically import materials. In these cases, we’ll guide you through manually assigning them.
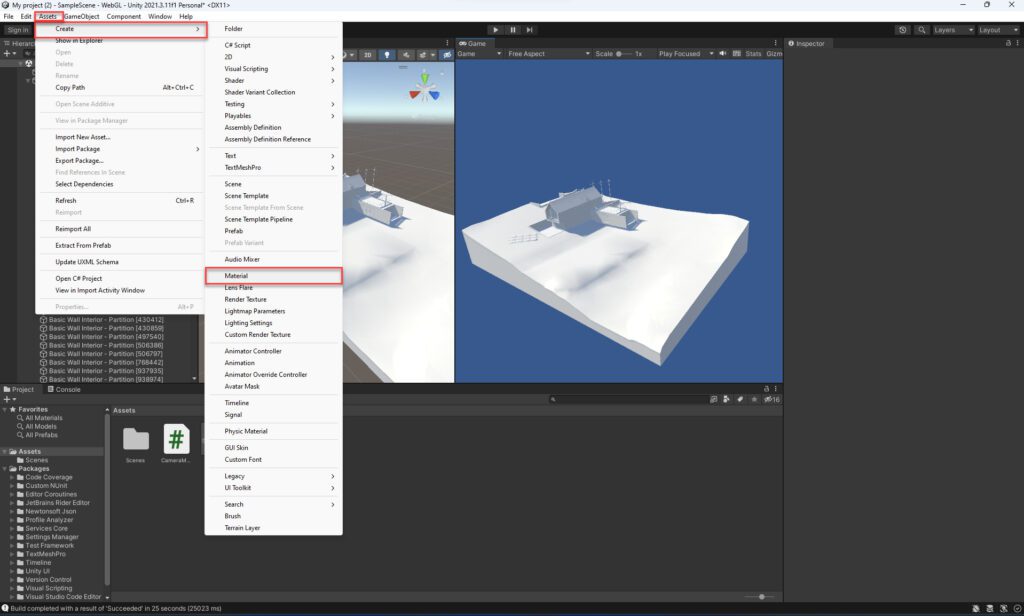
- To get started, create a material using the following steps:
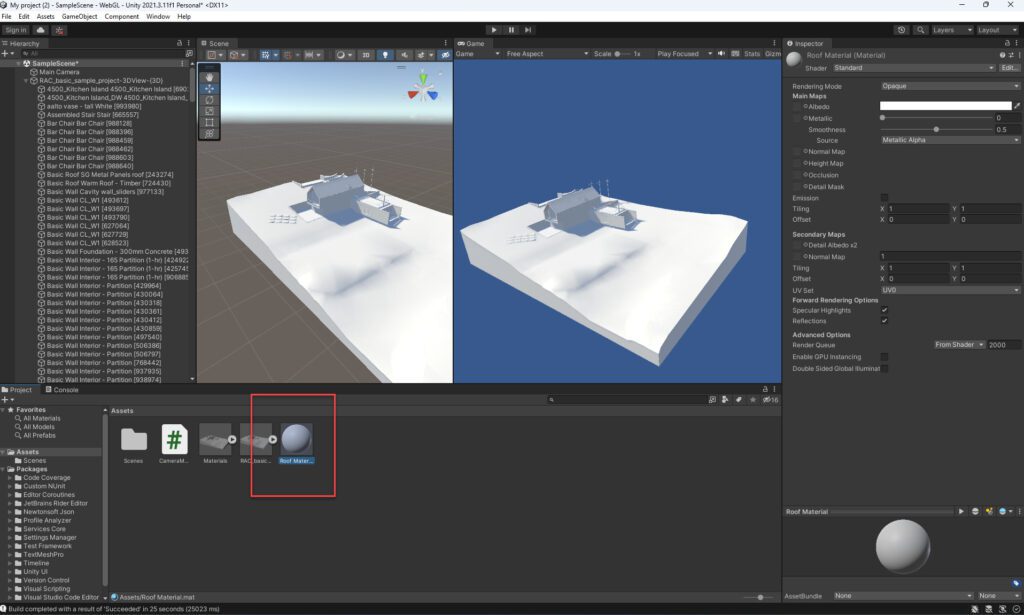
2. After creating the material, you’ll find it as a new material file within your Assets folder
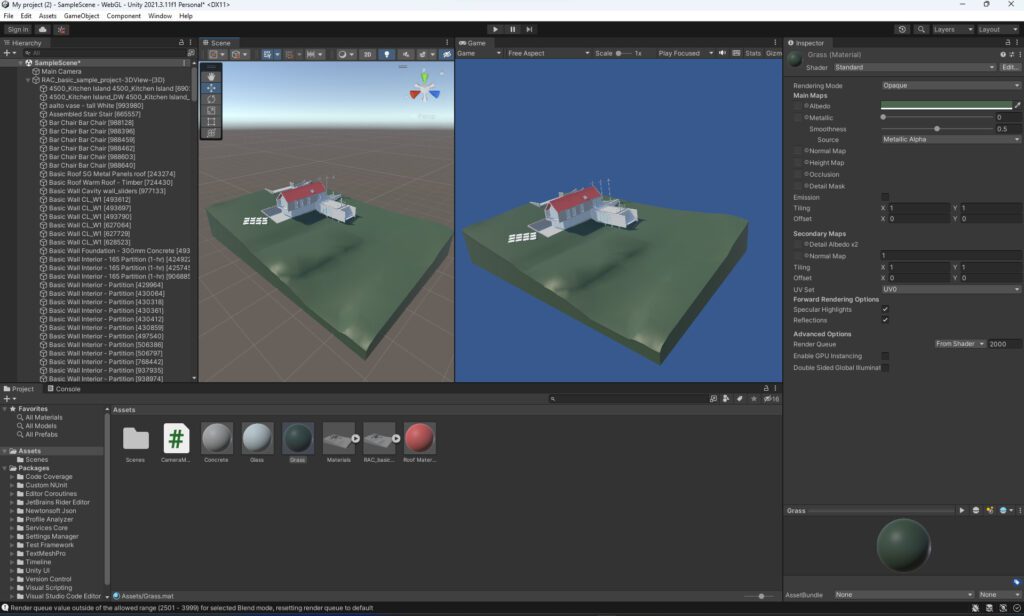
3. Click the new material file and modify its color, as we show in the image below:
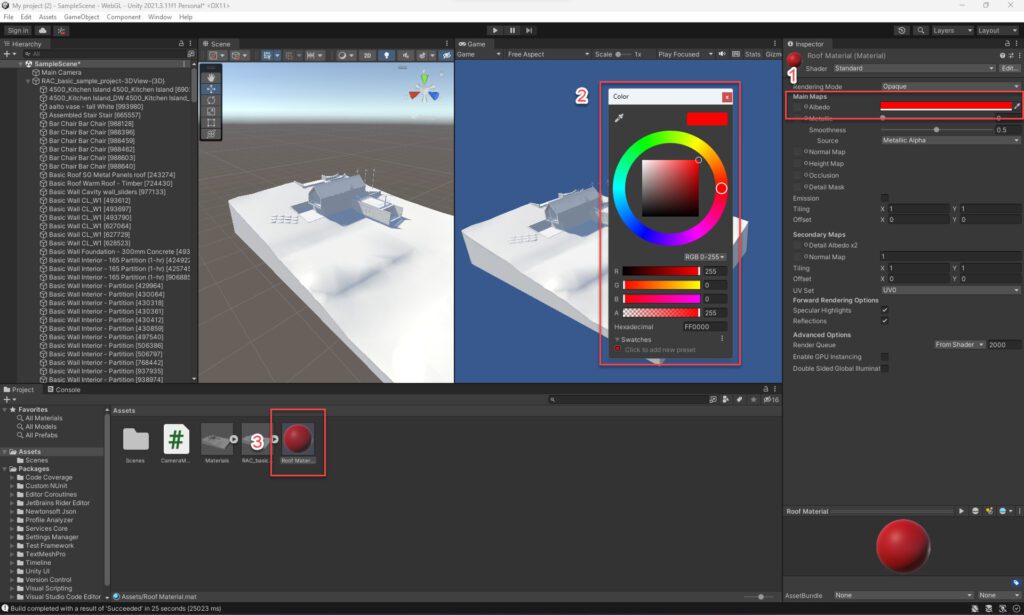
4. To color your mesh as I did with the roof (see image below), simply drag the material from the Assets folder and drop it onto the mesh in the scene.
Adjustments before deployment
For optimal viewing, we recommend making some adjustments to the HTML file before uploading your Unity-generated files. These adjustments will ensure it displays correctly in fullscreen mode. If you’re happy with a smaller, windowed view, you can skip this step. However, fullscreen typically provides a more immersive experience.
Here’s how to implement these adjustments:
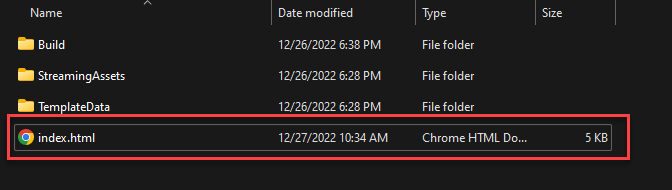
- Open the folder containing your viewer files and open the index.html file using a text editor.
2. Modify the “unity-container” element from this:
					<div id="unity-container" class="unity-desktop">
      <canvas id="unity-canvas" width=960 height=540></canvas>
To something like this to facilitate fullscreen display:
					<div id="unity-container" style="height: 100%; width: 100%;" >
      <canvas id="unity-canvas" width="auto" height="auto"></canvas>
3. Remove this code from the Unity footer section:
					<div id="unity-footer">
        <div id="unity-webgl-logo"></div>
        <div id="unity-fullscreen-button"></div>
        <div id="unity-build-title">My project (2)</div>
</div>
4. Adjust the canvas style accordingly to accommodate fullscreen rendering:
					canvas.style.width = "100%";
canvas.style.height = "100%";
Deploying to a Static Site
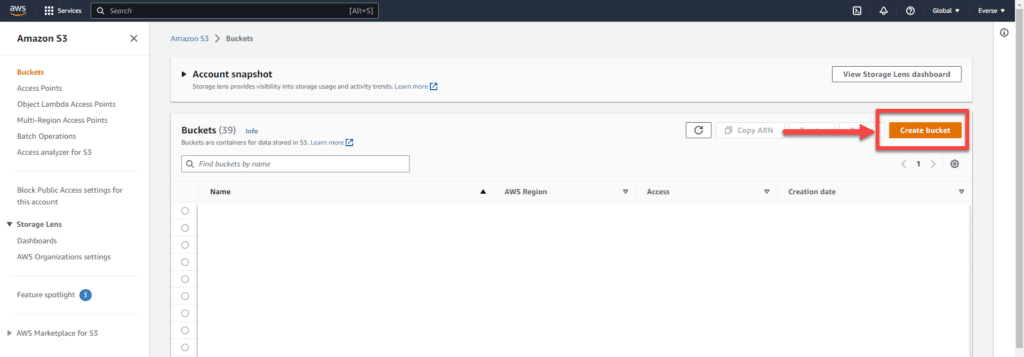
We’ll be deploying our project to an AWS static site using S3, a cost-effective storage solution ideal for small builds. If you don’t already have an Amazon account, you’ll need to create one. Follow these steps to configure S3 for deployment:
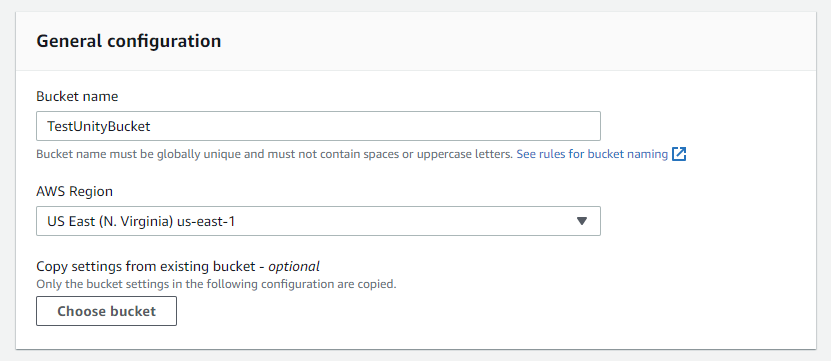
- Create a new bucket within the S3 section of your Amazon account.
2. Assign a unique name to your bucket.
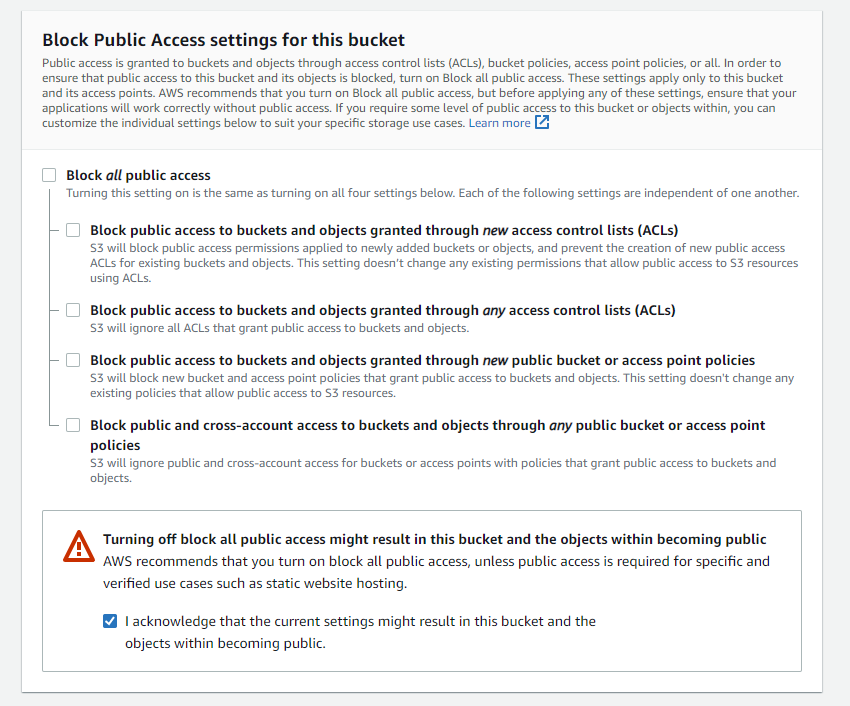
3. Enable public access to the bucket:
4. Hit Create Bucket.
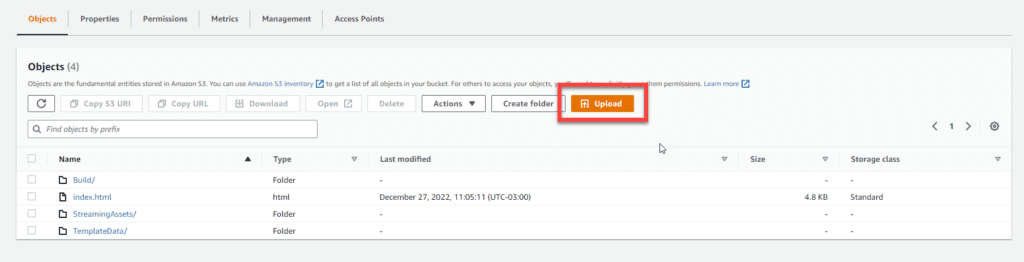
5. Open your bucket from the list of created buckets.
6. Upload all exported files from Unity to your designated bucket.
7. Configure the bucket policy to allow public read access with the following info:
					{
    "Version": "2012-10-17",
    "Statement": [
        {
            "Sid": "AllowPublicReadAccess",
            "Effect": "Allow",
            "Principal": "*",
            "Action": "s3:GetObject",
            "Resource": "arn:aws:s3:::NameOfYourBucketHere/*"
        }
    ]
}
8. Go to Properties > Static Website Hosting > Edit:
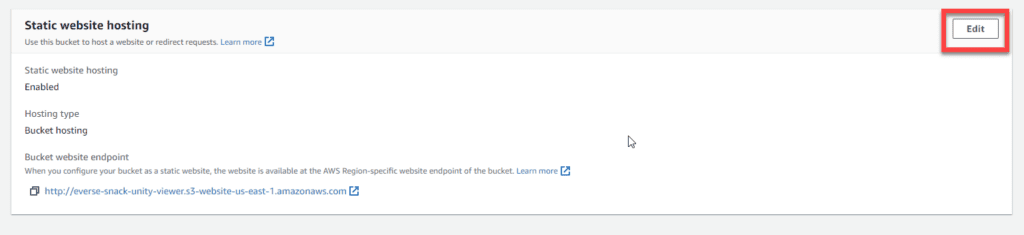
9. Enable static website hosting within the bucket properties, and set up Index.html as an index document. After that, save the changes.
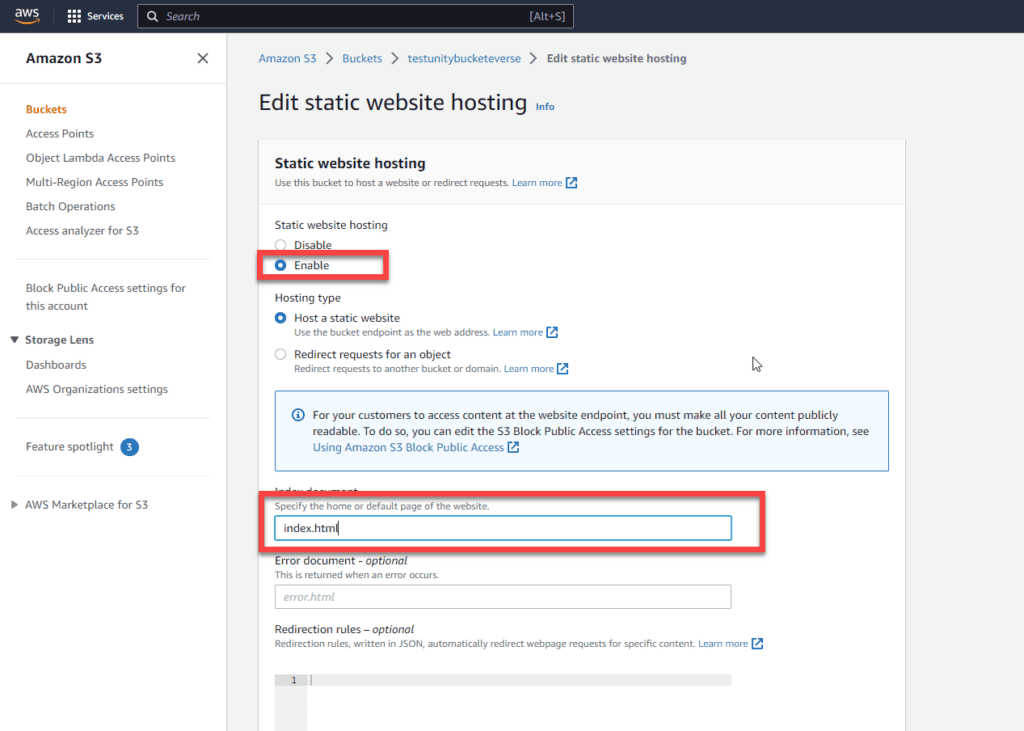
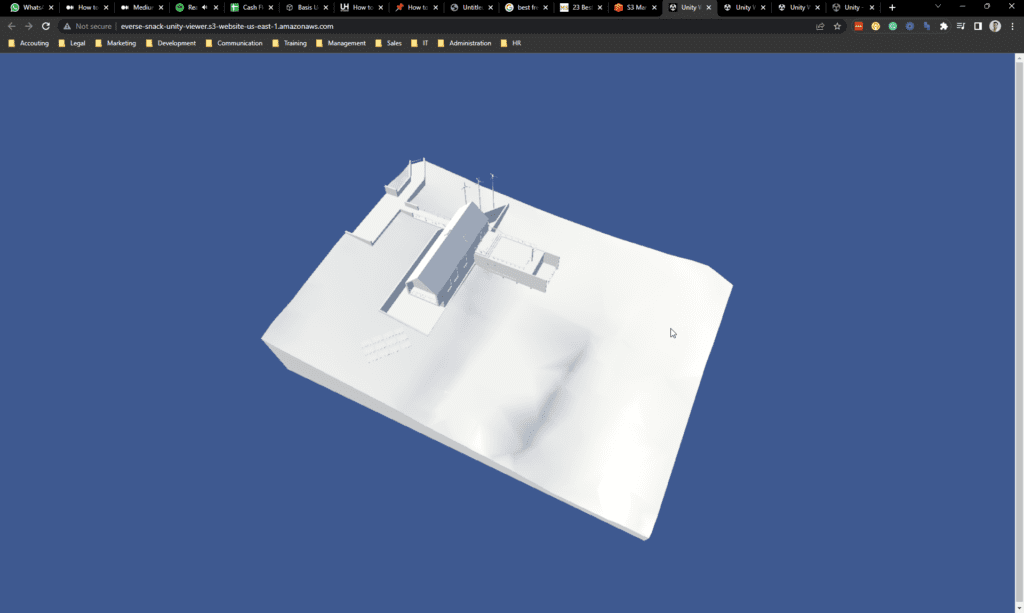
10. After the previous step, if you go to Properties > Static Website hosting > Bucket website endpoint, there should be a URL that looks like this: “http://yourbucketname.s3-website-us-east-1.amazonaws.com”
Upon completion, your bucket will be assigned a unique URL, providing access to your viewer on the S3 site!
This is just the beginning
While these steps may seem intricate initially, you can streamline the process by creating a reusable template so you only have to deal with this effort once.
We’re eager to explore various other topics such as effects, animations, controls, and dynamic 3D meshes in future discussions. Feel free to suggest which topics you’d like us to cover next!

Valentin Noves
I'm a versatile leader with broad exposure to projects and procedures and an in-depth understanding of technology services/product development. I have a tremendous passion for working in teams driven to provide remarkable software development services that disrupt the status quo. I am a creative problem solver who is equally comfortable rolling up my sleeves or leading teams with a make-it-happen attitude.