How to Edit a Revit File Preview Image
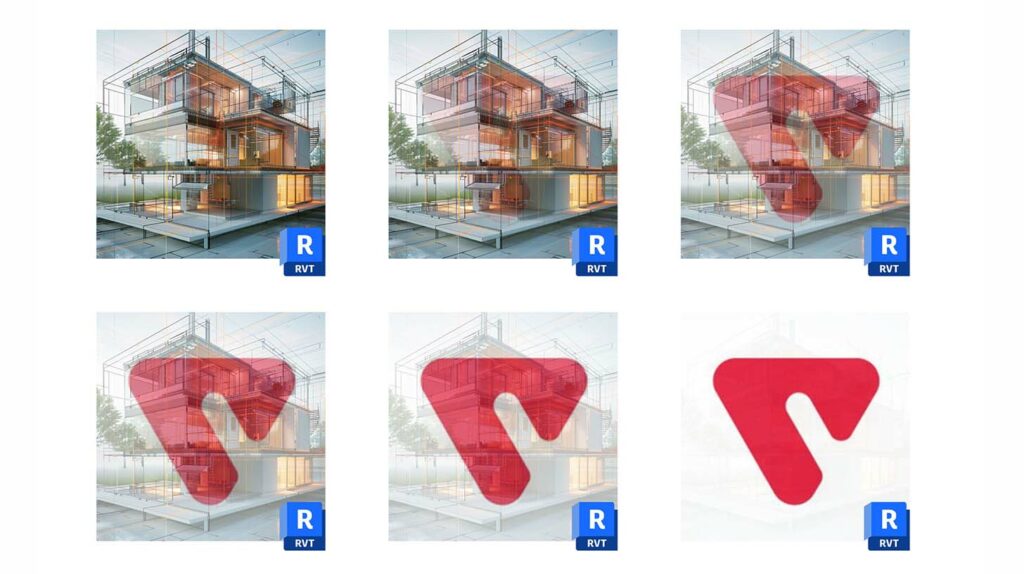
Is it Possible to Edit a Revit File Image Preview?
When working with Autodesk Revit, you might want to customize the image preview of your Revit files.
This image preview is the thumbnail that appears in Windows Explorer or other file managers, providing a quick visual reference for the file. Historically, the only way to accomplish this was by selecting a view to preview the Revit file, either by defining a fixed ID View or setting a temporary view, as explained by Jeremy Tammik.
But what if you want to define a custom image that is not even present in the Revit Model, such as your company’s logo, a render of a project, or an image that you might like?
Investigating the Revit file structure, I discovered a method for editing this preview image. This article will guide you through the process step-by-step.
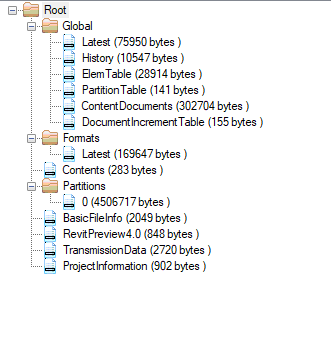
Understanding the Revit File Structure
To start this process, it is first important to understand how a Revit file works.
A Revit file (.rvt) is a compound binary format containing multiple data types within a single file. This format is quite complex and stores various elements such as 3D models, families, views, schedules, etc.
Then use 7ZIP to extract the file contents I got this, or you could use Sample Compound File Viewer
The next step would be to understand what each of these files does. With a little bit of research and AI help, I got the following information:
Global
The Global folder contains several vital files and tables essential for the overall integrity and management of the Revit project.
- ContentDocuments: This file likely stores additional documents or content related to the project, such as linked files or external references.
- DocumentIncrementTable: This file keeps track of the incremental changes or versions made to the document. It helps maintain a history of edits and updates.
- ElemTable: This file contains the main elements of the Revit project. Elements include walls, doors, windows, furniture, and other components within the model.
- History: This file logs the history of changes made to the project. It might include user actions, timestamps, and descriptions of modifications.
- Latest: Similar to the Formats folder, this file might store references to the latest global data or project state.
- PartitionTable: This file manages the partitions or divisions within the Revit project. Partitions can help organize and handle large projects by dividing them into manageable sections.
Formats
- Latest: This file typically stores metadata or references to the newest version of the Revit file format. It ensures compatibility and may help the software understand how to read the file’s contents.
Partitions
The Partitions folder contains subfolders representing different sections or categories within the project. Each partition might represent a different aspect of the building model, such as architectural, structural, or MEP (mechanical, electrical, plumbing) components.
- X: This subfolder represents a specific partition or section of the project. It might contain data specific to that partition, such as element definitions, parameters, and other related information.
Root Files
Several vital files provide essential information and features for the project at the root of the Revit file structure.
- BasicFileInfo: This file stores basic metadata about the Revit project, such as the project name, creation date, author, and other summary information.
- Contents: This file likely acts as a directory or index of all the contents within the Revit file. It helps locate and manage the project’s different components and elements.
- ProjectInformation: This file contains detailed information about the project, including project parameters, settings, and other relevant data.
- RevitPreview4.0: This file stores the preview image or thumbnail that appears when browsing the Revit file in Windows Explorer or other file managers. It gives a quick visual reference of the project’s current state.
- TransmissionData: This file manages data related to file transmission, such as links to external resources, shared coordinates, or other collaboration-related information.
Opening the file programmatically
First, I opened the binary to get the Magic number of the file ( D0 CF 11 E0 A1 B1 1A E1 ) from a list of signatures that tells me that this is a Compound File Binary Format with a File Signature (3E 00 04 00 FE FF 0C 00) that indicates it is “major version 4”. I looked for a C# library that allowed me to open this type of file and found one called OpenMcdf
					String filename = @"C:\Users\User\Desktop\Reverse\Originals\EmptyProject.rvt";
            CompoundFile cf = new CompoundFile(filename);
            CFStream foundStream = cf.RootStorage.GetStream("RevitPreview4.0");
This allowed me to separate the RevitPrevie4.0 as a separate file. I used a Hex editor (Free Hex Editor Neo) to open the file and understand its structure.
As you can see below this is what the a HEX editor looks like:
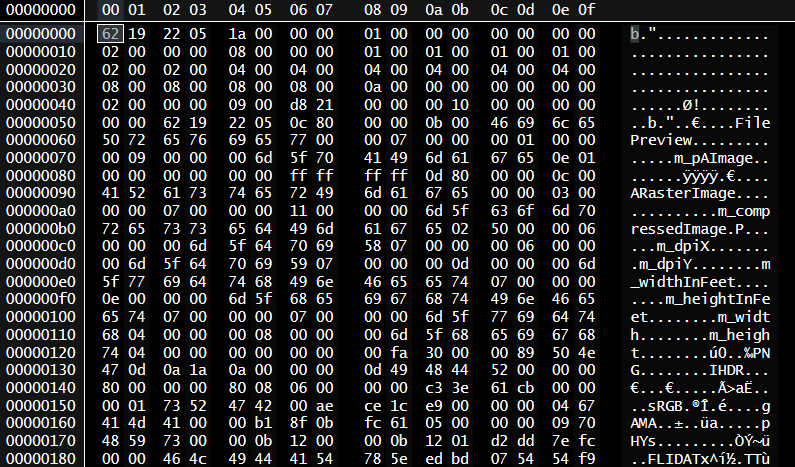
Based on the analysis I did on the binar file, It turns out that the file is structured in three simple pieces:
- A constant prefix part that provides information like the type of image and dimensions
- A PNG file
- A constant postfix part is needed for the closing part of the file.
So what it did is create a code that overwrites the bytes of the Preview4.0 with the prefix, a selected PNG and a postfix like the following code:
					            using (var outputStream = new MemoryStream())
            {
                // read and save prefix
                const string prefixFileName = "prefix.bin";
                var bytes = LoadResource(prefixFileName);
                outputStream.Write(bytes, 0, bytes.Length);

                // convert image to 128x128 Thumbnail Image with white background
                const int size = 128;
                using (var result = ThumbnailImage(sourceImg, size, Color.White, 72))
                {
                    // encode image to PNG
                    result.Save(outputStream, ImageFormat.Png);
                }

                // read and save postfix
                const string postfixFileName = "postix.bin";
                bytes = LoadResource(postfixFileName);
                outputStream.Write(bytes, 0, bytes.Length);

                return outputStream.ToArray();
            }
Defining the PNG
					private static Image ThumbnailImage(Image sourceImage, int imageSize, Color backgroundColor, int dpi, System.Drawing.Drawing2D.InterpolationMode interpolation = System.Drawing.Drawing2D.InterpolationMode.NearestNeighbor)
        {
            int thumbnailWidth = imageSize;
            int thumbnailHeight = imageSize;

            float aspectRatio = (float)sourceImage.Width / sourceImage.Height;
            float targetAspectRatio = (float)thumbnailWidth / thumbnailHeight;

            if (aspectRatio < targetAspectRatio)
            {
                thumbnailWidth = (int)(thumbnailHeight * aspectRatio);
            }
            else if (aspectRatio > targetAspectRatio)
            {
                thumbnailHeight = (int)(thumbnailWidth / aspectRatio);
            }

            var offset = new Point(0, 0);
            if (thumbnailWidth != imageSize)
            {
                offset.X = ((imageSize - thumbnailWidth) / 2);
            }
            if (thumbnailHeight != imageSize)
            {
                offset.Y = ((imageSize - thumbnailHeight) / 2);
            }

            var bmpImage = new Bitmap(imageSize, imageSize, PixelFormat.Format32bppArgb);
            bmpImage.SetResolution(dpi, dpi);

            using (Graphics graphics = Graphics.FromImage(bmpImage))
            {
                graphics.Clear(backgroundColor);
                graphics.InterpolationMode = interpolation;
                graphics.DrawImage(sourceImage, new Rectangle(offset.X, offset.Y, thumbnailWidth, thumbnailHeight), new Rectangle(0, 0, sourceImage.Width, sourceImage.Height), GraphicsUnit.Pixel);
            }

            return bmpImage;
        }
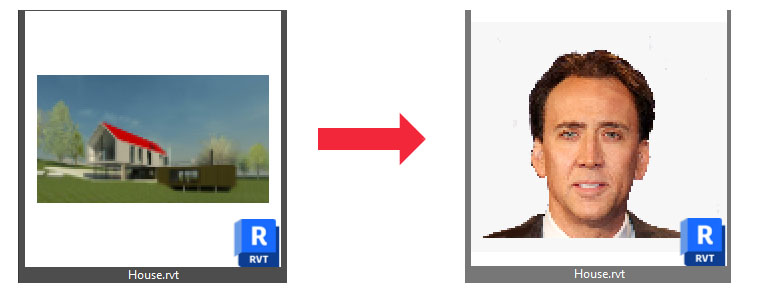
Doing the whole process
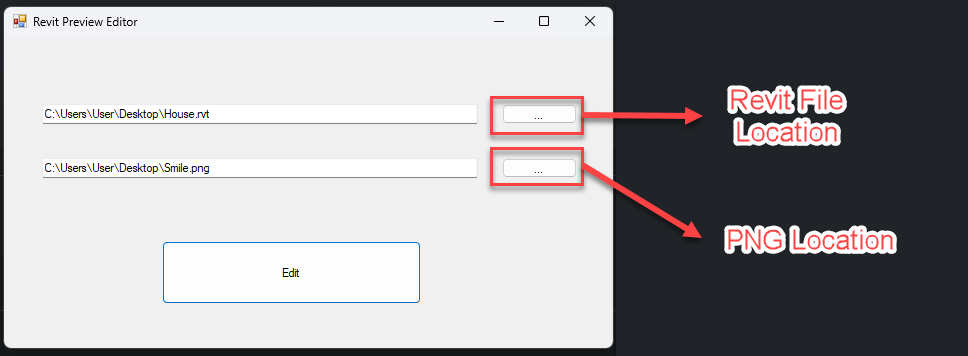
I know this process might sound too complicated, but we have created a tool that can be run. You select a Revit file and a PNG, and it will automatically update the preview image. You can find the solution Here.
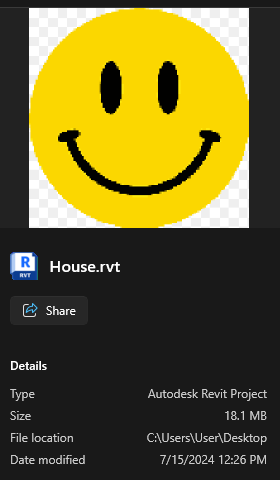
I have selected a smiley face as the input PNG. As a result, you end up with a file like this:
Conclusion
Editing the image preview of a Revit file involves understanding the compound binary format of Revit files and using a hex editor to manipulate the embedded image data. You can customize the file’s thumbnail by carefully replacing the old image data with new data. This method requires technical knowledge and caution, but it’s a powerful way to personalize your Revit files.
I uncovered this technique by investigating the Revit file structure and experimenting with different tools. It’s a testament to the value of exploring and understanding the software’s underlying formats.
In the coming blog posts, we will continue working on editing Rvt files from outside Revit.

Valentin Noves
I'm a versatile leader with broad exposure to projects and procedures and an in-depth understanding of technology services/product development. I have a tremendous passion for working in teams driven to provide remarkable software development services that disrupt the status quo. I am a creative problem solver who is equally comfortable rolling up my sleeves or leading teams with a make-it-happen attitude.