Revit Add-in Blueprint: e-verse’s Scalable Solution

The Path
As architects-coders, BIM developers, or just power users that build projects or products in the AEC industry, many of us have tested multiple approaches to efficiently coding Revit add-ins. I struggled with this for a while.
My path and I’m sure many others, started with Dynamo, then PyRevit since I started coding in Python. The ease of use, lack of boilerplate code, and language choice make this a good starting point. But, when complexities arise, tapping into Revit’s API directly is usually the way to go. To do this, we need to use .NET Framework and its flagship programming language: C#.
In that realm, we need to take care of building the application, packaging it, and deploying it in a frictionless, safe, and scalable way. The problem is there’s no standard recipe to do all this. In fact, there are many. So, how do we do it at e-verse? We’ve gone through plenty of iterations testing and improving our approach. We think sharing it may help other people in the industry who, like me, struggled with finding the most scalable and efficient way to do all this when we first started, using different tedious approaches to, for example, maintain an add-in for multiple Revit versions.
Our Recipe for Revit add-ins
Our general add-in structure looks like this:
- A git code repository
- A .NET Framework solution containing multiple projects
- The key here is to have different Class Library projects that compile a single Shared Project, so the code is the same but compiles targeting multiple Revit versions in a single operation
- A set of NuGet dependencies
- Post-build events to make debugging and releasing easier
- A configuration file to manage settings and environment variables outside the main logic
- CI/CD pipelines leveraging GitHub Actions to take care of releases for development, production, and any other environments needed
There are several templates and wizards to do this, but for this example, we’ll do it from scratch just to illustrate the structure better, from a clean start, and for you to apply it to your specific case. We’re just going to cover an add-in “skeleton” with almost no functionality but stay tuned for posts on our e-verse framework, which allows for better management of the different logical layers of an add-in.
We’ll dive right in. You can follow each step in this GitHub repo.
1. A git code repository
Create an empty git repository locally or on a git provider like GitHub. For this example, we’ll go with GitHub:

After that, clone it locally, and add a .gitignore manifest to avoid committing unnecessary files to source control. For this type of project, we use something like this.
2. A .NET Framework solution containing multiple projects
Unfortunately, we need to use .NET Framework for this. This is a condition to integrate with Revit’s API.
Having said that, many of us have dealt with the need to support multiple Revit versions, and there are many takes on this topic around.
Our go-to approach here is to separate the main logic from the projects that do the compiling. This way, we can use as many class library projects as we need, targeting different Revit API DLLs using NuGet without changing our application logic. There are other posts around that discuss this, like this one from Archi-lab.
What is a .NET Framework?
The .NET framework is a software development platform developed by Microsoft. It provides a comprehensive programming environment for building, deploying, and running applications and services that use .NET technologies. The .NET platform encompasses a large class library called the Framework Class Library (FCL) and supports multiple programming languages, including C#, VB.NET, and F#. Its interoperability, coupled with Windows-based applications and a managed execution environment, makes it a preferred choice for many developers. Over time, it has evolved, leading to newer versions like .NET Core and .NET 5, which cater to cross-platform needs.
How to create a Revit add-in that supports multiple projects?
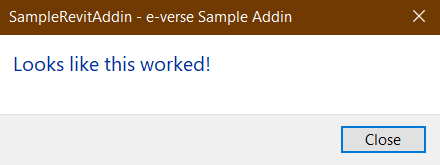
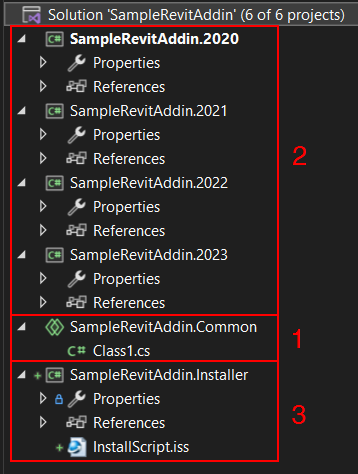
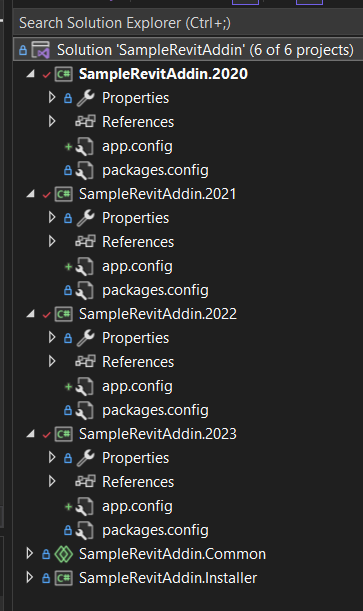
Let’s assume we want to create an add-in that supports Revit 2020 to 2023 and displays a Hello World-like task dialog. To do this, you need to create a .NET Framework solution, and inside it, six projects:
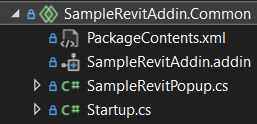
- A Shared Project for the add-in code and manifest, with one button displaying a task dialog:

- Class Library (.NET Framework) projects that compile the Shared Project for each Revit version we want to support (four, in this case), plus a Resources project (optional, we will expand on this in a separate post)
- An InnoSetup project that will contain the
.issmanifest specifying how and what we need to package and copy to the user’s computer, compiling an.exeinstaller to deploy the add-in. For more info on this, check our blog post about InnoSetup
After this, we need to:
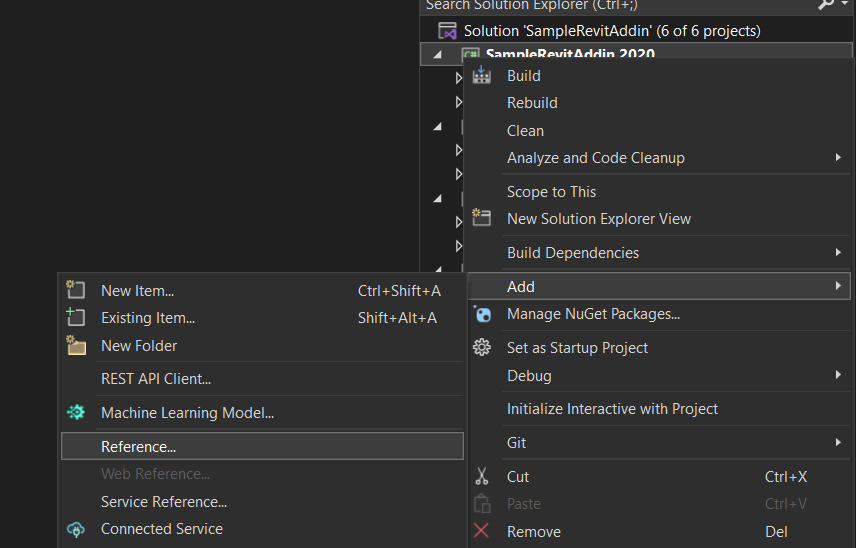
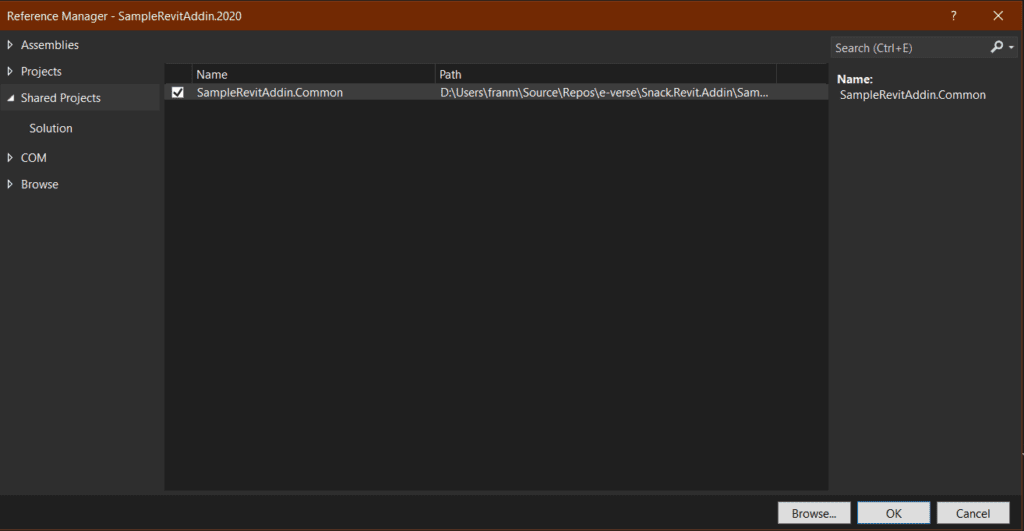
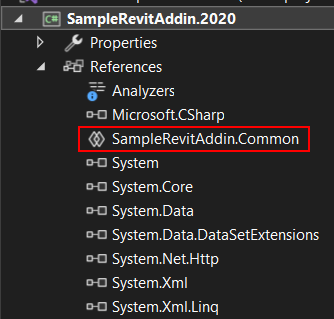
- Reference our Shared Project from the Class Libraries to tell Visual Studio that we need to compile the code in the Shared Project inside each Class Library:
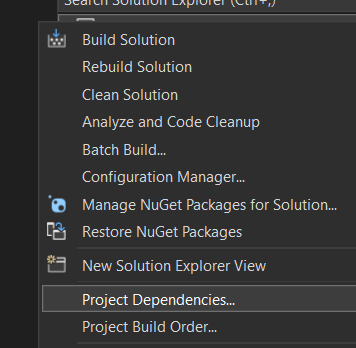
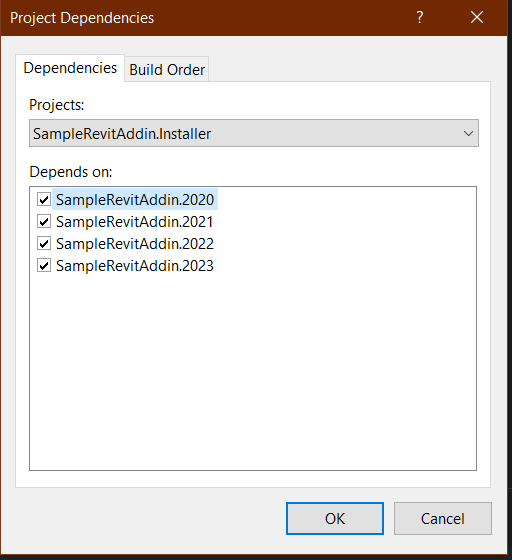
2. Set our compiling dependencies to ensure we build all the Class Libraries before we package the installer. If not, InnoSetup won’t find the DLLs it needs to package and cause it to fail. For this, right-click on the solution and go to Project Dependencies:
3. Add our add-in logic and .addin manifest to the Shared Project:

At this point, we’re ready to move to the next item.
3. A set of NuGet dependencies
This is how we want to reference Revit’s API DLL files. Here, we want to avoid referencing local files in any system since that won’t allow us to build the project in different systems or a cloud environment, thus not being scalable or easy to maintain. NuGet helps us manage dependencies, offering a wide variety of packages, including Revit’s API in different versions. We usually go with this one.
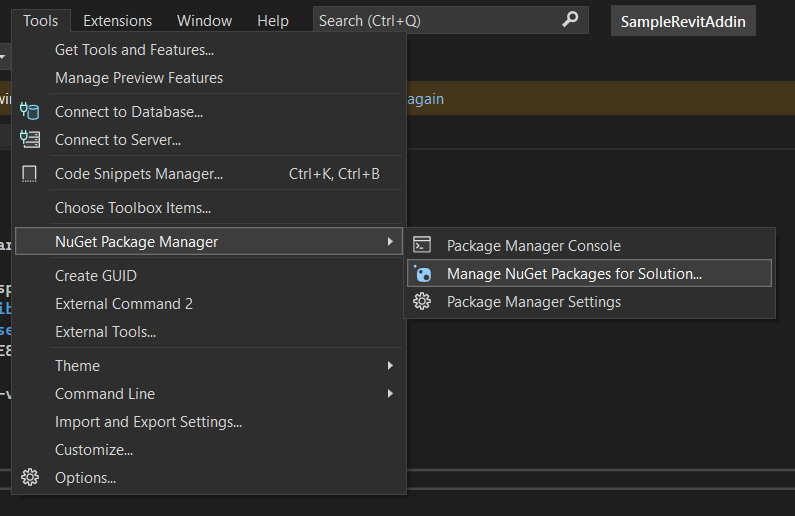
To use the package, we need to install different versions for each of our Class Libraries, depending on the Revit version we’re targeting in each case. We can do this from the NuGet CLI or the Package Manager Window in Visual Studio:
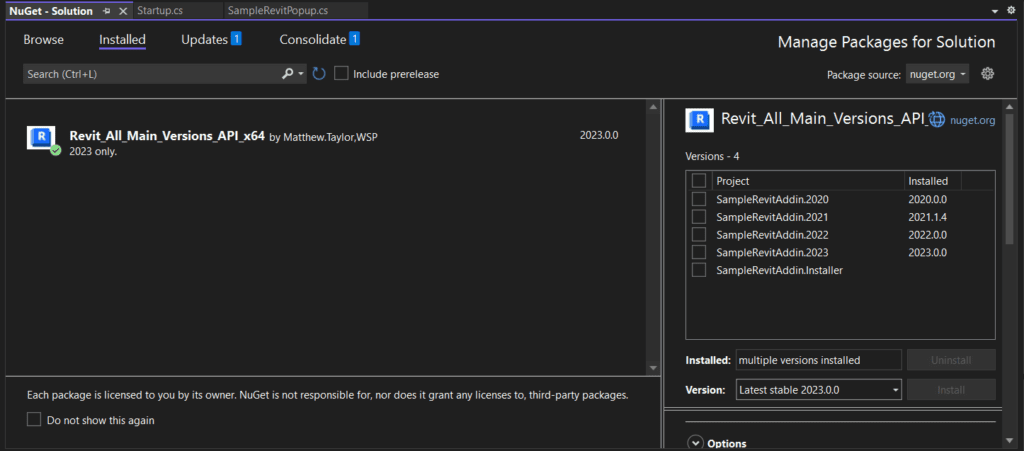
If you do it from the UI, you can select each project and choose a Revit API package version to install on it from the Version dropdown.
If you do it from the CLI, you can choose a project from the dropdown:
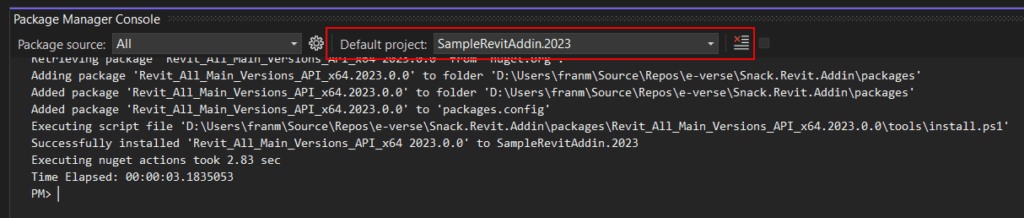
And run an install command like:
Install-Package Revit_All_Main_Versions_API_x64 -v 2023.0.0
This will allow us to use the Revit API of the versions we target in each Class Library inside our Shared Project, where our code will be. Also, install the InnoSetup package on your installer project the same way.
4. Post-build events to make debugging and releasing easier
We’ll set up our post-build events in our Class Libraries that compile. We’ll use two build configurations: Debug and Release.
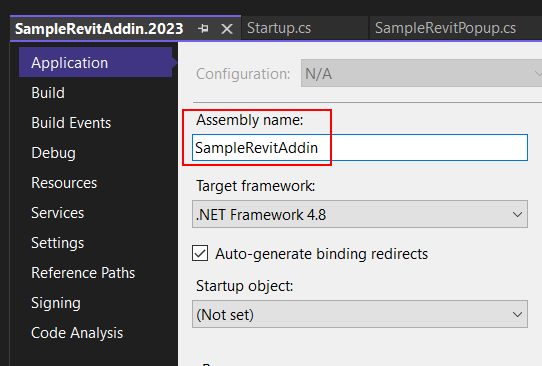
First, make sure your Assembly Name is consistent across versions:
For debugging, what we usually need is to copy the add-in DLLs and required files to our local Revit add-ins folder for developers to be able to quickly code and debug in Revit. This will be set in all class libraries that compile for different Revit versions:
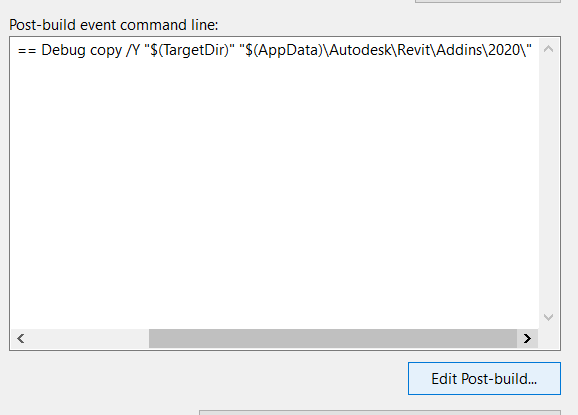
if $(ConfigurationName) == Debug copy /Y "$(TargetDir)" "$(AppData)\Autodesk\Revit\Addins20\”
Make sure to change the target folder according to each version.
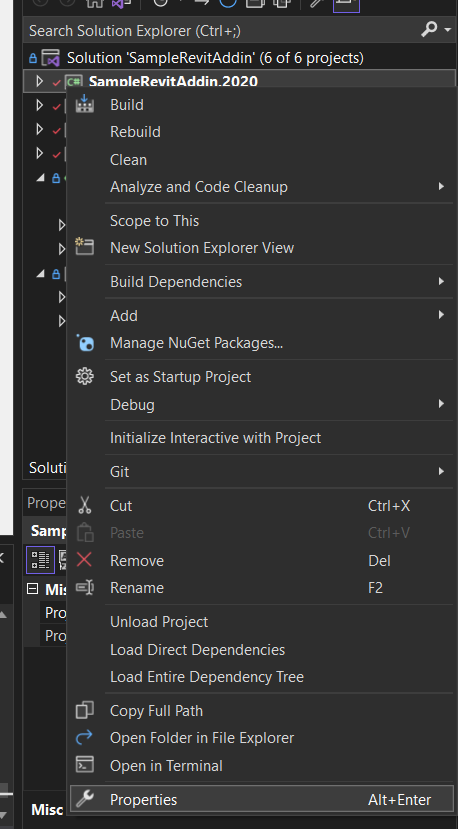
For releases, we want to build the installer calling the InnoSetup command. Make sure to install the InnoSetup package in the Installer project first, and then set the post-build command on the installer project properties:
if $(ConfigurationName) == Release "$(SolutionDir)packages\Tools.InnoSetup.6.2.1\tools\ISCC.exe" "$(ProjectDir)InstallScript.iss"
Here, we can add a little optional extra to delete any versions we copied previously when debugging:
					if $(ConfigurationName) == Release  del "$(AppData)\Autodesk\Revit\Addins20\SampleRevitAddin.dll" /q
if $(ConfigurationName) == Release  del "$(AppData)\Autodesk\Revit\Addins20\SampleRevitAddin.pdb" /q
if $(ConfigurationName) == Release  del "$(AppData)\Autodesk\Revit\Addins20\SampleRevitAddin.Resources.dll" /q
if $(ConfigurationName) == Release  del "$(AppData)\Autodesk\Revit\Addins20\SampleRevitAddin.Resources.pdb" /q
if $(ConfigurationName) == Release  del "$(AppData)\Autodesk\Revit\Addins20\SampleRevitAddin.addin" /q

if $(ConfigurationName) == Release  del "$(AppData)\Autodesk\Revit\Addins21\SampleRevitAddin.dll" /q
if $(ConfigurationName) == Release  del "$(AppData)\Autodesk\Revit\Addins21\SampleRevitAddin.pdb" /q
if $(ConfigurationName) == Release  del "$(AppData)\Autodesk\Revit\Addins21\SampleRevitAddin.Resources.dll" /q
if $(ConfigurationName) == Release  del "$(AppData)\Autodesk\Revit\Addins21\SampleRevitAddin.Resources.pdb" /q
if $(ConfigurationName) == Release  del "$(AppData)\Autodesk\Revit\Addins21\SampleRevitAddin.addin" /q

if $(ConfigurationName) == Release  del "$(AppData)\Autodesk\Revit\Addins22\SampleRevitAddin.dll" /q
if $(ConfigurationName) == Release  del "$(AppData)\Autodesk\Revit\Addins22\SampleRevitAddin.pdb" /q
if $(ConfigurationName) == Release  del "$(AppData)\Autodesk\Revit\Addins22\SampleRevitAddin.dll" /q
if $(ConfigurationName) == Release  del "$(AppData)\Autodesk\Revit\Addins22\SampleRevitAddin.Resources.pdb" /q
if $(ConfigurationName) == Release  del "$(AppData)\Autodesk\Revit\Addins22\SampleRevitAddin.addin" /q

if $(ConfigurationName) == Release  del "$(AppData)\Autodesk\Revit\Addins23\SampleRevitAddin.dll" /q
if $(ConfigurationName) == Release  del "$(AppData)\Autodesk\Revit\Addins23\SampleRevitAddin.pdb" /q
if $(ConfigurationName) == Release  del "$(AppData)\Autodesk\Revit\Addins23\SampleRevitAddin.dll" /q
if $(ConfigurationName) == Release  del "$(AppData)\Autodesk\Revit\Addins23\SampleRevitAddin.pdb" /q
if $(ConfigurationName) == Release  del "$(AppData)\Autodesk\Revit\Addins23\SampleRevitAddin.addin" /q
This way, we’re ready to debug effortlessly and build our installer on releases, whether locally or on the cloud! Notice we always use relative paths to ensure we’re not tied to local directories.
5. A configuration file to manage settings and environment variables outside the main logic
There are many cases where we may need to insert different environment variables depending on the case or save user settings and other runtime data.
Let’s say you need to push Revit data to a custom API and target different endpoints depending on your environment. Let’s assume you have two: development and production. You can add individual app.config files where you can save this outside your code to each project:
Your settings file may look like this:
					<?xml version="1.0" encoding="utf-8"?>
<configuration>
  <configSections>
  </configSections>
  <startup>
    <supportedRuntime version="v4.0" sku=".NETFramework,Version=v4.8" />
  </startup>
  <appSettings>
    <add key="GetURL" value="https://qa-samplerevitaddin/api/getData" />
    <add key="PostURL" value="https://qa-samplerevitaddin/api/postData" />
  </appSettings>
</configuration>
You can modify the variables here from your CI/CD pipelines. If, for example, you want to target different environments, read these variables from your code.
To clarify, there are many ways to do this, and sometimes depending on security requirements, you may need to store these as secrets somewhere else. We don’t want to expand on this topic too much since we want to focus on Revit add-in basics, but we will do so in future posts.
6. CI/CD pipelines leveraging GitHub actions to take care of releases for development, production, and any other environments needed
Studies show that good DevOps practices make teams happier (no joke, here is the data). To achieve that happiness, we need to eliminate deployment pain. An excellent way to do that is to set up your CI/CD pipelines from scratch using GitHub Actions, so every time you merge to specific branches, you know your release will be generated automatically, with all your application compiled and packaged into an installer ready for use. For this example, we need to do this for two environments: staging and production.
To start, create a directory called .github/workflows inside our repo’s root folder. This is the standard for GitHub Actions to know where our CI/CD scripts will be located. Here, for this example, we will create three .yml files:
dev_actions.yml⇒ compiles our solution and runs any tests availablestaging_actions.yml⇒ compiles our solution, builds the installer, and makes a pre-release on GitHub (marked as a beta release with a-bsuffix)production_actions.yml⇒ compiles our solution, builds the installer, and makes a release on GitHub
Take a look at them here.
Another critical point here is versioning. Again, there are many approaches to this, but we’ve found one that is surprisingly easy to implement using a tool called GitVersion. This will read a file on our repository and use that to determine the next version of our add-in. It’s already embedded in the example repo.
For that, create a GitVersion.yml file in the root of the repository. Here we will manage the versions assigned to our add-in by our GitHub actions:
					#GitVersion.yml

mode: ContinuousDeployment
next-version: 0.1.0
Once we have these in place, we’ll ensure everything compiles and see if it passes any tests available every time we merge or push to specific branches. When merging to staging, we’ll have a pre-release in GitHub and a production release when merging to main. Each could have its environment values injected and ready for anyone to use, whether your QA team or the final client in production.
With all this setup, building and maintaining your Revit add-ins should be smooth as a breeze!
If you want to dig deeper into any of the items mentioned or things we haven’t covered here, we uploaded a basic example of this complete Revit add-in structure to a public GitHub repo. Feel free to clone, fork, or use it as a reference for your projects!
Invitation
Here we covered just the basics, but stay tuned for more posts about Revit add-ins:
- External resource management (you’ll notice in this example we used a separate Resources project to reference our add-in’s icons, but there are other possible approaches).
- Configurations and environment variables.
- Code architecture and our e-verse framework to make the add-in code cleaner.
You’ve seen the structure of how we build Revit add-ins at e-verse. How do you do it? Do you have different approaches to the things mentioned here? We’d love to hear about them and keep improving together!

Francisco Maranchello
A proactive entrepreneur at heart who constantly seeks new challenges. As an Architect who codes, I have broadened my skill set through a passion for technology and innovation. I believe technology is the future of architecture and the built world. Always learning and leveraging cutting-edge technologies to seek new answers, I bring a holistic approach when facing new challenges.