How to create your first Unity BIM viewer: Part II

Intro
In the first post of the series, How to create your first Unity BIM viewer, we learnt what Unity is, when to use it, and the first step to creating a basic viewer locally. In this second post, we’ll show you how to make the model look better and how to take that local viewer to the cloud so anybody can access it.
Improve the look and feel
Before we start working on putting everything online, lets make some improvements to make it look better. Let’s start improving the background. When creating a new project, you get a default light blue and gray background. To change it to something different, like a plain color, select your camera, go to the object inspector, and change the clear flag to a solid color and the background to the desired color.

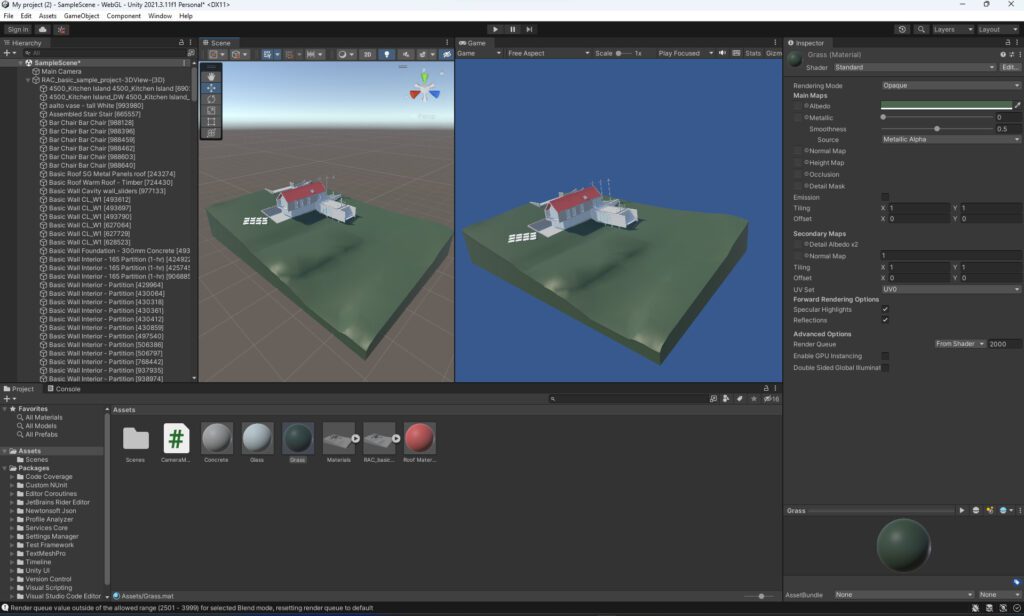
Add Materials
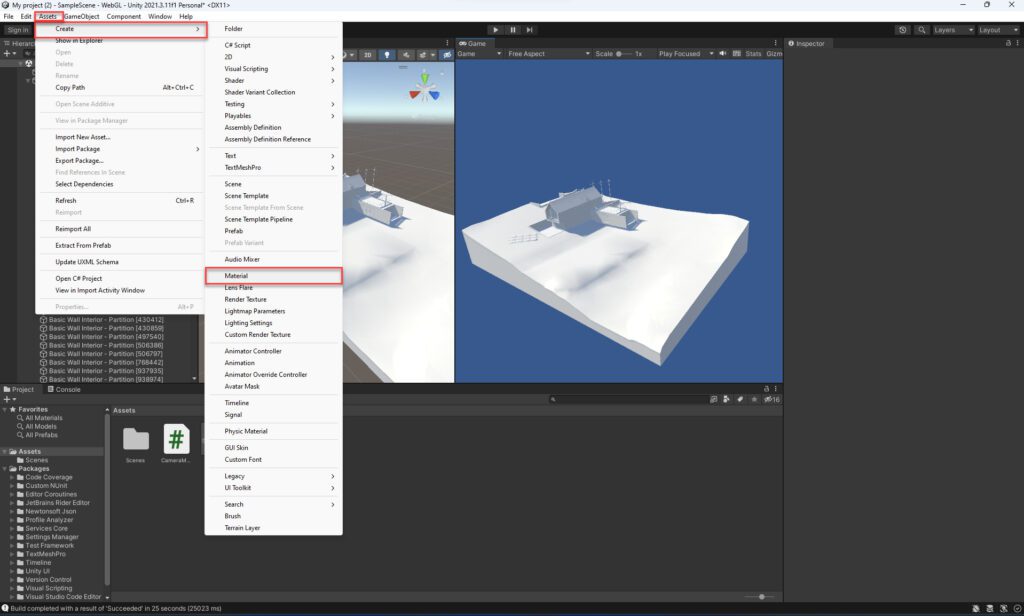
When importing models you bring meshes with their materials with formats like glTF or it can happen like it did in out FBX example that no material is assigned, because of this we’ll show you how to add them manually.
The first step is to create a material following the steps below:
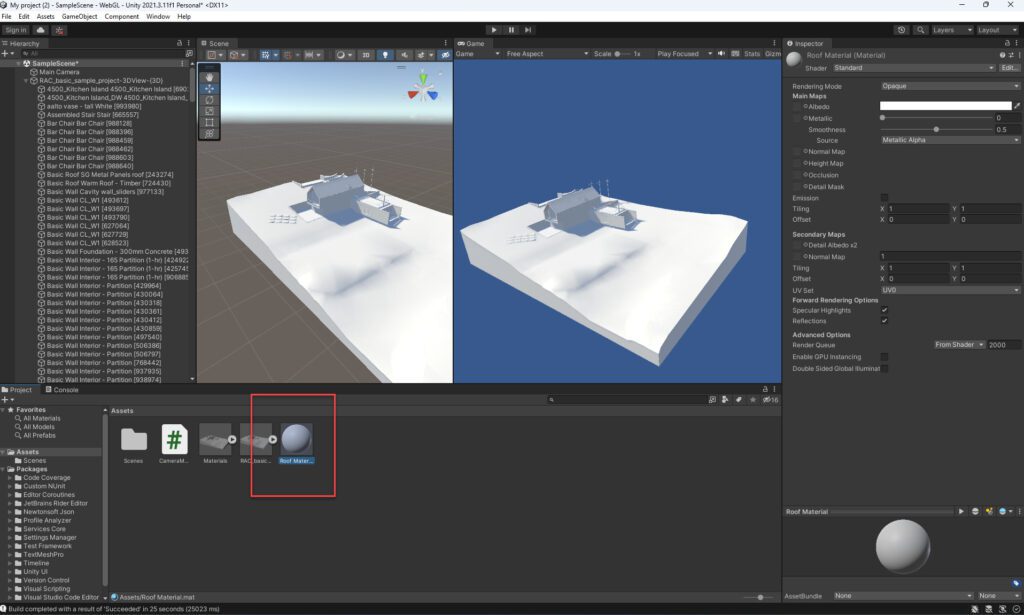
After the material es created a new object will appear in your assets section
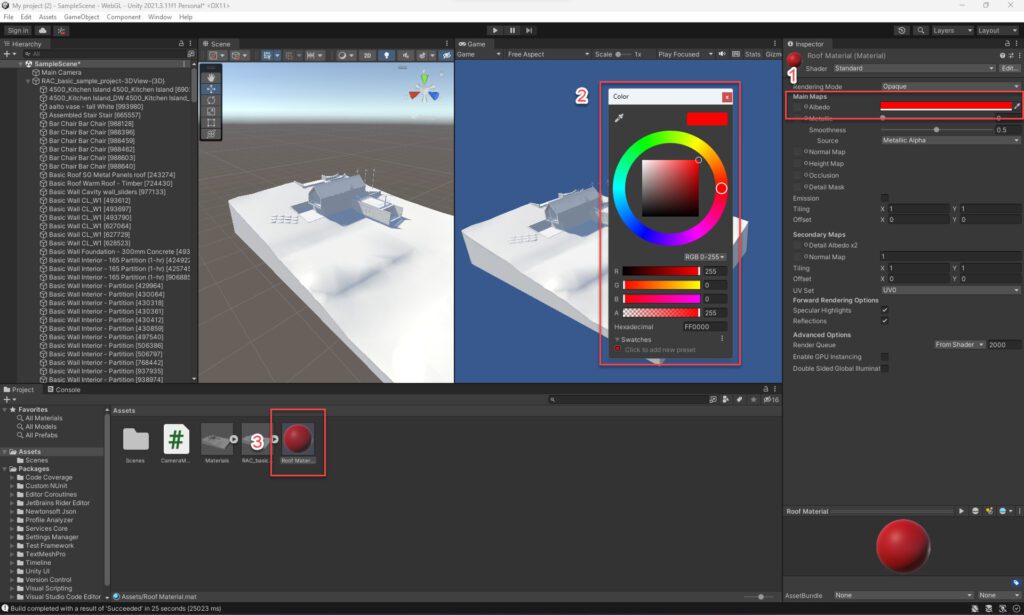
You can click on it an change it’s color like the image below
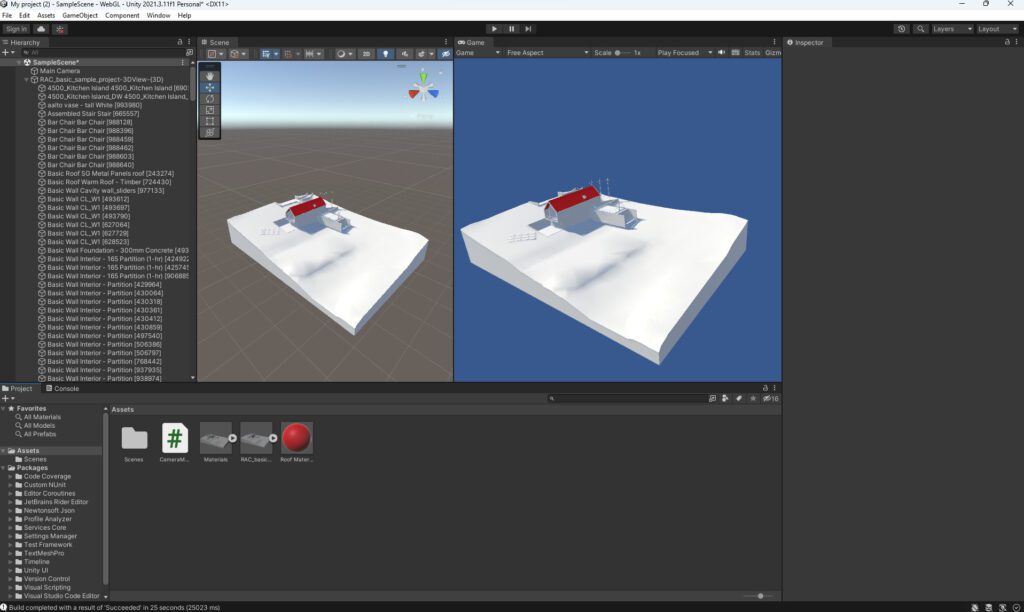
To assign a color like I did with the roof in the image below you just drab the material on top of the mesh an that’s it.
Adjustments before deployment
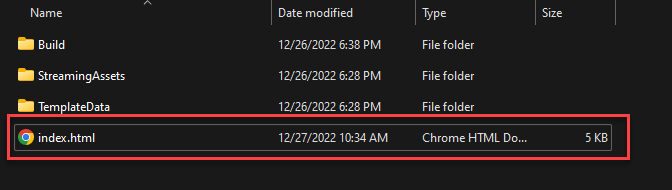
So before uploading the files we created with Unity, we have to make some adjustments to the HTML file to run it as a full screen by default. You can skip this step if you just want to show the viewer in a small rectangle, but most likely, this is not your case.
- Open the folder where you built the viewer files and open the index.html file with any text editor:
2. Edit the “unity-container” from this:
					<div id="unity-container" class="unity-desktop">
      <canvas id="unity-canvas" width=960 height=540></canvas>
to something like this:
					<div id="unity-container" style="height: 100%; width: 100%;" >
      <canvas id="unity-canvas" width="auto" height="auto"></canvas>
3. Remove this code from the Unity footer:
					<div id="unity-footer">
        <div id="unity-webgl-logo"></div>
        <div id="unity-fullscreen-button"></div>
        <div id="unity-build-title">My project (2)</div>
</div>
4. Adjust the canvas style to look like this:
					canvas.style.width = "100%";
canvas.style.height = "100%";
How to deploy to a static site?
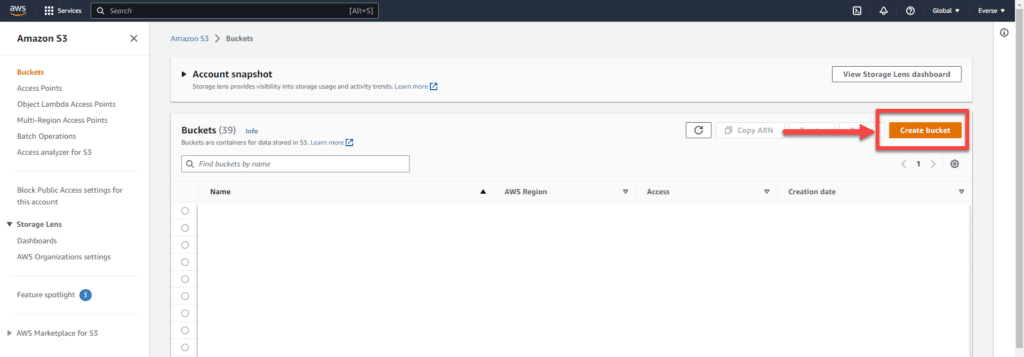
In our case, we’ll deploy to an AWS static site, (you must create an Amazon account, in case you don’t have one), and we’ll upload our files to S3, a small, beautiful, and cheap alternative for hosting small builds. Follow the steps below to configure it:
- Create a bucket by going to the S3 section on Amazon:
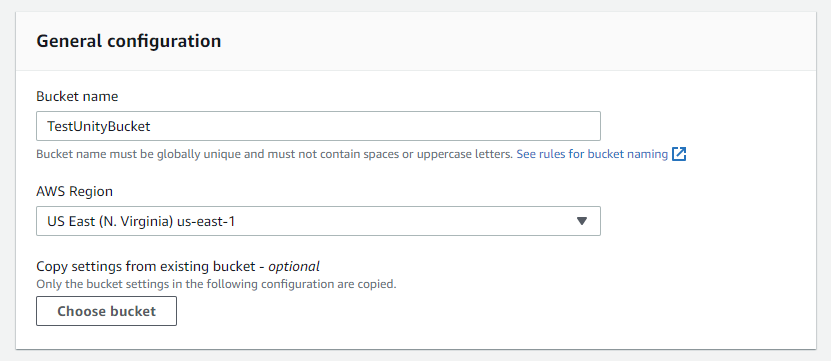
2. Set a name for your bucket:
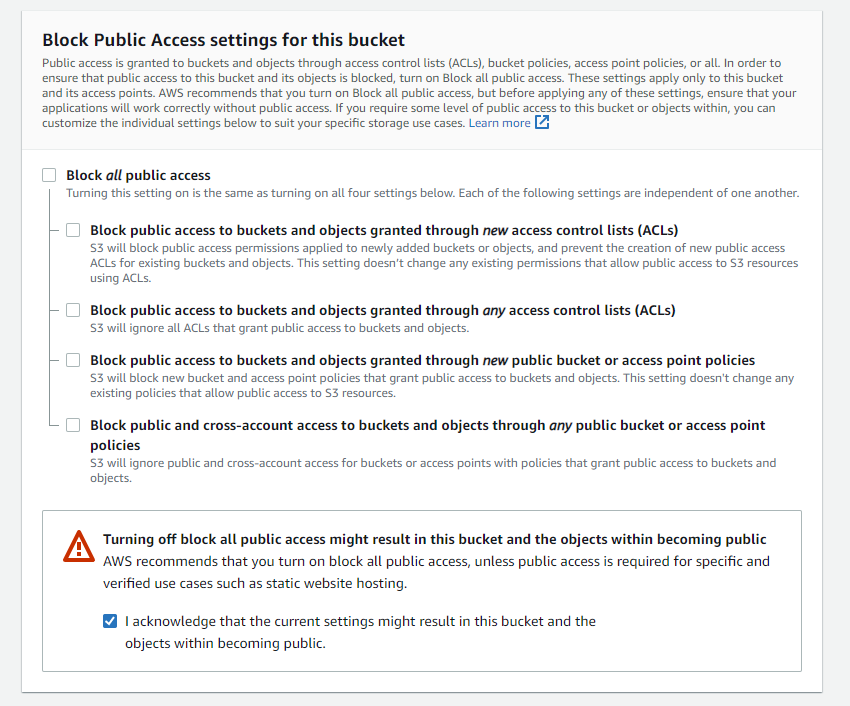
3. Enable public access to the bucket:
4. Hit Create Bucket.
5. Open your bucket from the list of created buckets.
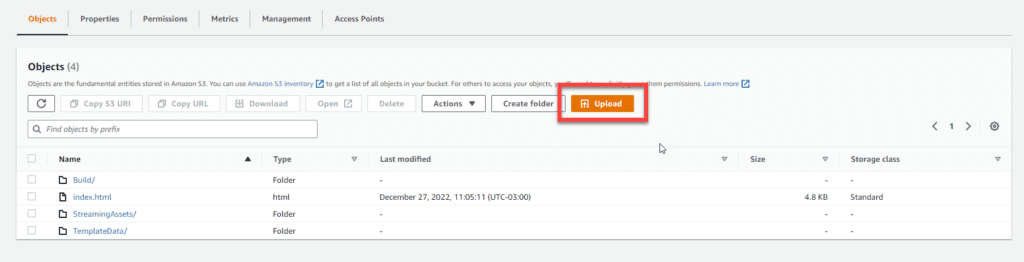
6. Go to Objects and upload all the files we exported out of Unity.
8. Go to Permissions and edit Bucket Policy with the following info:
					{
    "Version": "2012-10-17",
    "Statement": [
        {
            "Sid": "AllowPublicReadAccess",
            "Effect": "Allow",
            "Principal": "*",
            "Action": "s3:GetObject",
            "Resource": "arn:aws:s3:::NameOfYourBucketHere/*"
        }
    ]
}
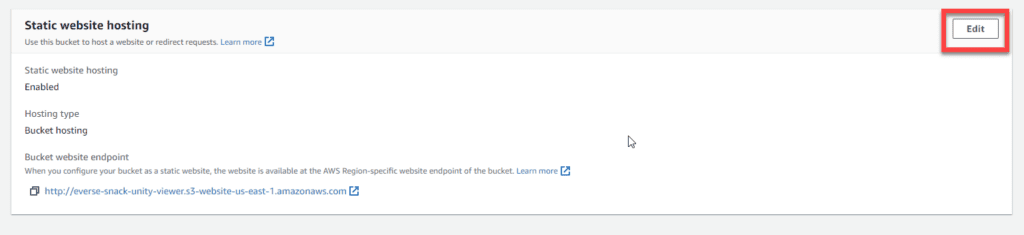
9. Go to Properties > Static Website Hosting > Edit:
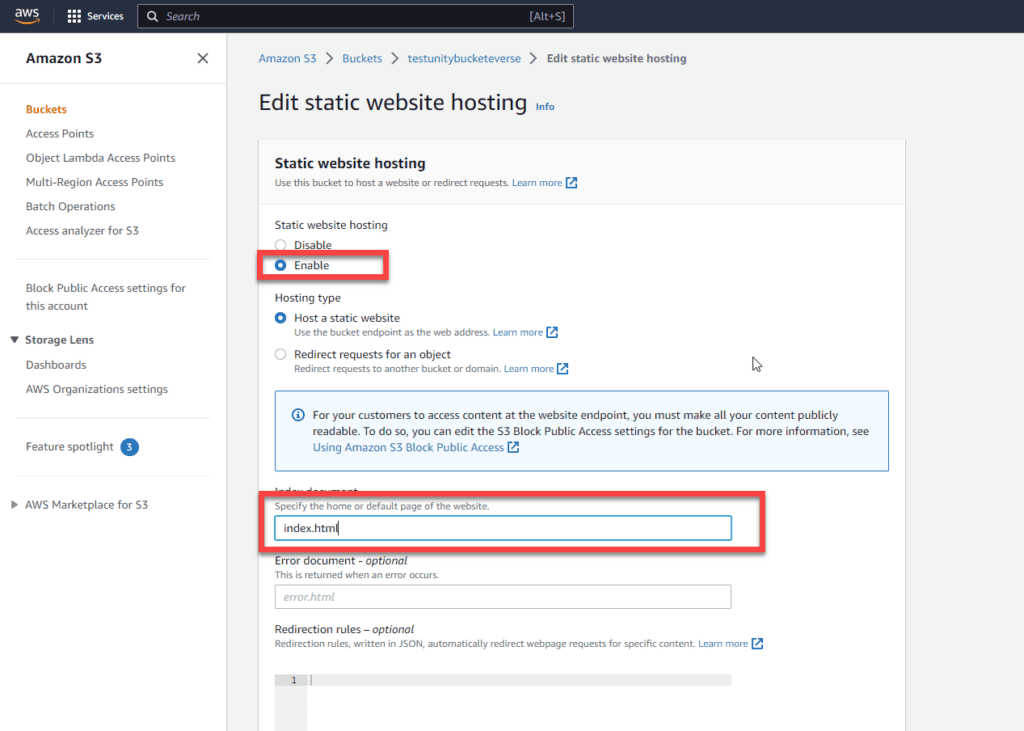
10. Enable static website hosting and set up Index.html as an index document. After that, hit save:
11. After the previous step, if you go to Properties > Static Website hosting > Bucket website endpoint, there should be a URL that looks like this:
“http://yourbucketname.s3-website-us-east-1.amazonaws.com”
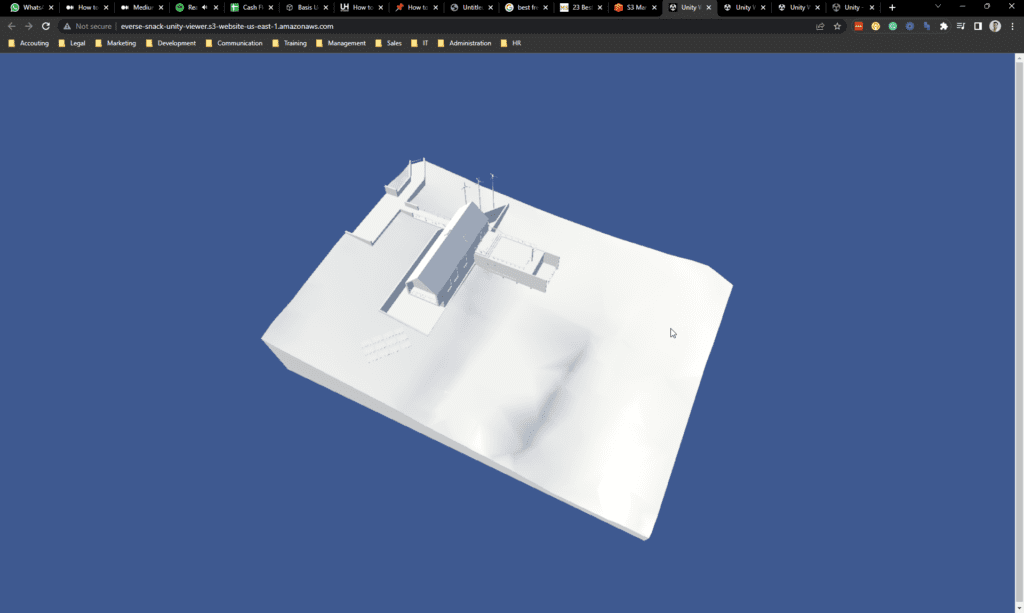
So, after all these configurations, if you open the URL, you’ll end up with a viewer on your S3 site. Congrats!
This is just the beginning
As you can see, we need a couple of steps to upload your viewer, but you can always set up a template, so you only have to deal with this effort once.
We would like to talk about many other topics like effects, animations, controls, dynamic 3D meshes, etc., but please let us know which one you’d like us to consider!

Valentin Noves
I'm a versatile leader with broad exposure to projects and procedures and an in-depth understanding of technology services/product development. I have a tremendous passion for working in teams driven to provide remarkable software development services that disrupt the status quo. I am a creative problem solver who is equally comfortable rolling up my sleeves or leading teams with a make-it-happen attitude.